
Table of Contents (Start)
- Topics
- Introducing SevOne
- Login
- Startup Wizard
- Dashboard
- Global Search - Advanced Search
- Report Manager
- Report Attachment Wizard
- Report Properties
- Report Interactions
- Instant Graphs
- TopN Reports
- Alerts
- Alert Archives
- Alert Summary
- Instant Status
- Status Map Manager
- Edit Maps
- View Maps
- FlowFalcon Reports
- NBAR Reports
- Logged Traps
- Unknown Traps
- Trap Event Editor
- Trap Destinations
- Trap Destination Associations
- Policy Browser
- Create and Edit Policies
- Threshold Browser
- Create and Edit Thresholds
- Probe Manager
- Discovery Manager
- Device Manager
- New Device
- Edit Device
- Object Manager
- High Frequency Poller
- Device Summary
- Device Mover
- Device Groups
- Object Groups
- Object Summary
- Object Rules
- VMware Browser
- Calculation Plugin
- Cisco ACI Plugin
- Database Manager
- Deferred Data Plugin
- DNS Plugin
- HTTP Plugin
- ICMP Plugin
- IP SLA Plugin
- JMX Plugin
- NAM
- NBAR Plugin
- Portshaker Plugin
- Process Plugin
- Proxy Ping Plugin
- SNMP Plugin
- VMware Plugin
- Web Status Plugin
- WMI Plugin
- xStats Plugin
- Indicator Type Maps
- Device Types
- Object Types
- Object Subtype Manager
- Calculation Editor
- xStats Source Manager
- User Role Manager
- User Manager
- Session Manager
- Authentication Settings
- Preferences
- Cluster Manager
- Maintenance Windows
- Processes and Logs
- Metadata Schema
- Baseline Manager
- FlowFalcon View Editor
- Map Flow Objects
- FlowFalcon Views
- Flow Rules
- Flow Interface Manager
- MPLS Flow Mapping
- Network Segment Manager
- Flow Protocols and Services
- xStats Log Viewer
- SNMP Walk
- SNMP OID Browser
- MIB Manager
- Work Hours
- Administrative Messages
- Enable Flow Technologies
- Enable JMX
- Enable NBAR
- Enable SNMP
- Enable Web Status
- Enable WMI
- IP SLA
- SNMP
- SevOne Data Bus
- Quality of Service
- Perl Regular Expressions
- Trap Revisions
- Integrate SevOne NMS With Other Applications
- Email Tips and Tricks
- SevOne NMS PHP Statistics
- SevOne NMS Usage Statistics
- Glossary and Concepts
- Map Flow Devices
- Trap v3 Receiver
- Guides
- SevOne Implementation Guide
- SevOne Best Practices Guide - Cluster, Peer, and HSA
- SevOne Installation Guide - Virtual Appliance
- SevOne NMS Installation Guide
- SevOne SAML Single Sign-On Setup Guide
- Access Control Quick Start Guide - SevOne NMS 5.7
- Data Miner Quick Start Guide - SevOne NMS 5.7
- Flow Quick Start Guide - SevOne NMS 5.7
- Group Aggregated Indicators Quick Start Guide - SevOne NMS 5.7
- IP SLA Quick Start Guide - SevOne NMS 5.7
- JMX Quick Start Guide - SevOne NMS 5.7
- LDAP Quick Start Guide - SevOne NMS 5.7
- Metadata Quick Start Guide - SevOne NMS 5.7
- RESTful API Quick Start Guide - SevOne NMS 5.7
- Self-monitoring Quick Start Guide - SevOne NMS 5.7
- SevOne NMS Admin Notifications Quick Start Guide - SevOne NMS 5.7
- SNMP Quick Start Guide - SevOne NMS 5.7
- Synthetic Indicator Types Quick Start Guide - SevOne NMS 5.7
- Topology Quick Start Guide - SevOne NMS 5.7
- VMware Quick Start Guide - SevOne NMS 5.7
- Web Status Quick Start Guide - SevOne NMS 5.7
- WMI Quick Start Guide - SevOne NMS 5.7
- xStats Quick Start Guide - SevOne NMS 5.7
RESTful API Quick Start Guide - SevOne NMS 5.7
SevOne Documentation
All SevOne user documentation is available online from the SevOne Support customer portal.
Copyright © 2005-2020 SevOne Inc. All rights reserved worldwide.
All right, title, and interest in and to the software and documentation are and shall remain the exclusive property of SevOne and its respective licensors. No part of this document may be reproduced by any means nor modified, decompiled, disassembled, published or distributed, in whole or in part, or translated to any electronic medium or other means without the written consent of SevOne.
In no event shall SevOne, its suppliers, nor its licensors be liable for any damages, whether arising in tort, contract, or any other legal theory even if SevOne has been advised of the possibility of such damages, and SevOne disclaims all warranties, conditions, or other terms, express or implied, statutory or otherwise, on software and documentation furnished hereunder including without limitation the warranties of design, merchantability, or fitness for a particular purpose, and noninfringement.
All SevOne marks identified or used on the SevOne website, as updated by SevOne from time to time, may be, or are, registered with the U.S. Patent and Trademark Office and may be registered or pending registration in other countries. All other trademarks or registered trademarks contained and/or mentioned herein are used for identification purposes only and may be trademarks or registered trademarks of their respective companies.
Introduction
SevOne's RESTful API implements the Swagger specification for API documentation. You can view SevOne API Documentation and perform operations related to SevOne NMS data using the Swagger UI. You can use the Swagger Editor to generate a client SDK based on SevOne's API documentation. The client SDK is available in several languages such as C#, JavaScript, and Python, just to name a few. In this document, we'll look at using the Swagger UI and Swagger Editor with the SevOne API.
The following areas of SevOne NMS now have a REST API:
-
Alert Streaming
-
Alerts
-
Device
-
Device Group Rules
-
Device Groups
-
Device Metadata
-
Device Plugins
-
Discovery (queue management)
-
Indicator
-
Maintenance Windows
-
Maps
-
NetFlow
-
Object
-
Object Group Metadata
-
Object Group Rules
-
Object Groups
-
Policies
-
Policy Conditions
-
Report Attachments
-
Reports
-
Tags
-
TopN Views
-
User Login
-
User Tokens
-
Users
-
Work Hours
As of SevOne NMS 5.7.2.7, RESTful API is shipped with predefined concurrency limit which is configurable per group. By default, three groups (default, slow, and reports) are configured.
Each group is defined by name, limit, retry, wait-between and priority.
-
name - Name of the group.
-
limit - Limit of simultaneous active requests.
-
retry - Number of retries before re-dispatch.
-
wait-between - The time in milliseconds between retries.
-
priority - Requests are organized from lowest to highest priority. The default value is 5. Must be an integer.
The config properties can be modified in /usr/local/share/rest-api/rest-prod.properties file.
For additional details, please contact SevOne Support.
Prerequisites
The RESTful API is available for SevOne NMS 5.6 and higher. In order to use it, users must have a valid account in SevOne NMS.
For information about REST API and SevOne NMS port requirements, please refer to the SevOne Best Practices Guide - Cluster, Peer, and HSA.
Configuration
Using the Swagger UI
In this section, we'll sign in to the Swagger UI and walk through a couple of examples. You can use the Swagger UI to perform the following types of operations:
-
POST - create a resource.
-
GET - retrieve one or more resources.
-
DELETE - delete a resource.
-
PATCH - partially update a resource.
-
PUT - fully update a resource.
Authentication
Before performing any API operations, you'll need to sign in. Perform the following steps.
-
First, go to the SevOne API Documentation page . To do this, open your browser and enter the following:
http://<PAS hostname or IP address>/api/docs/
For example:
http://10.129.12.61/api/docs/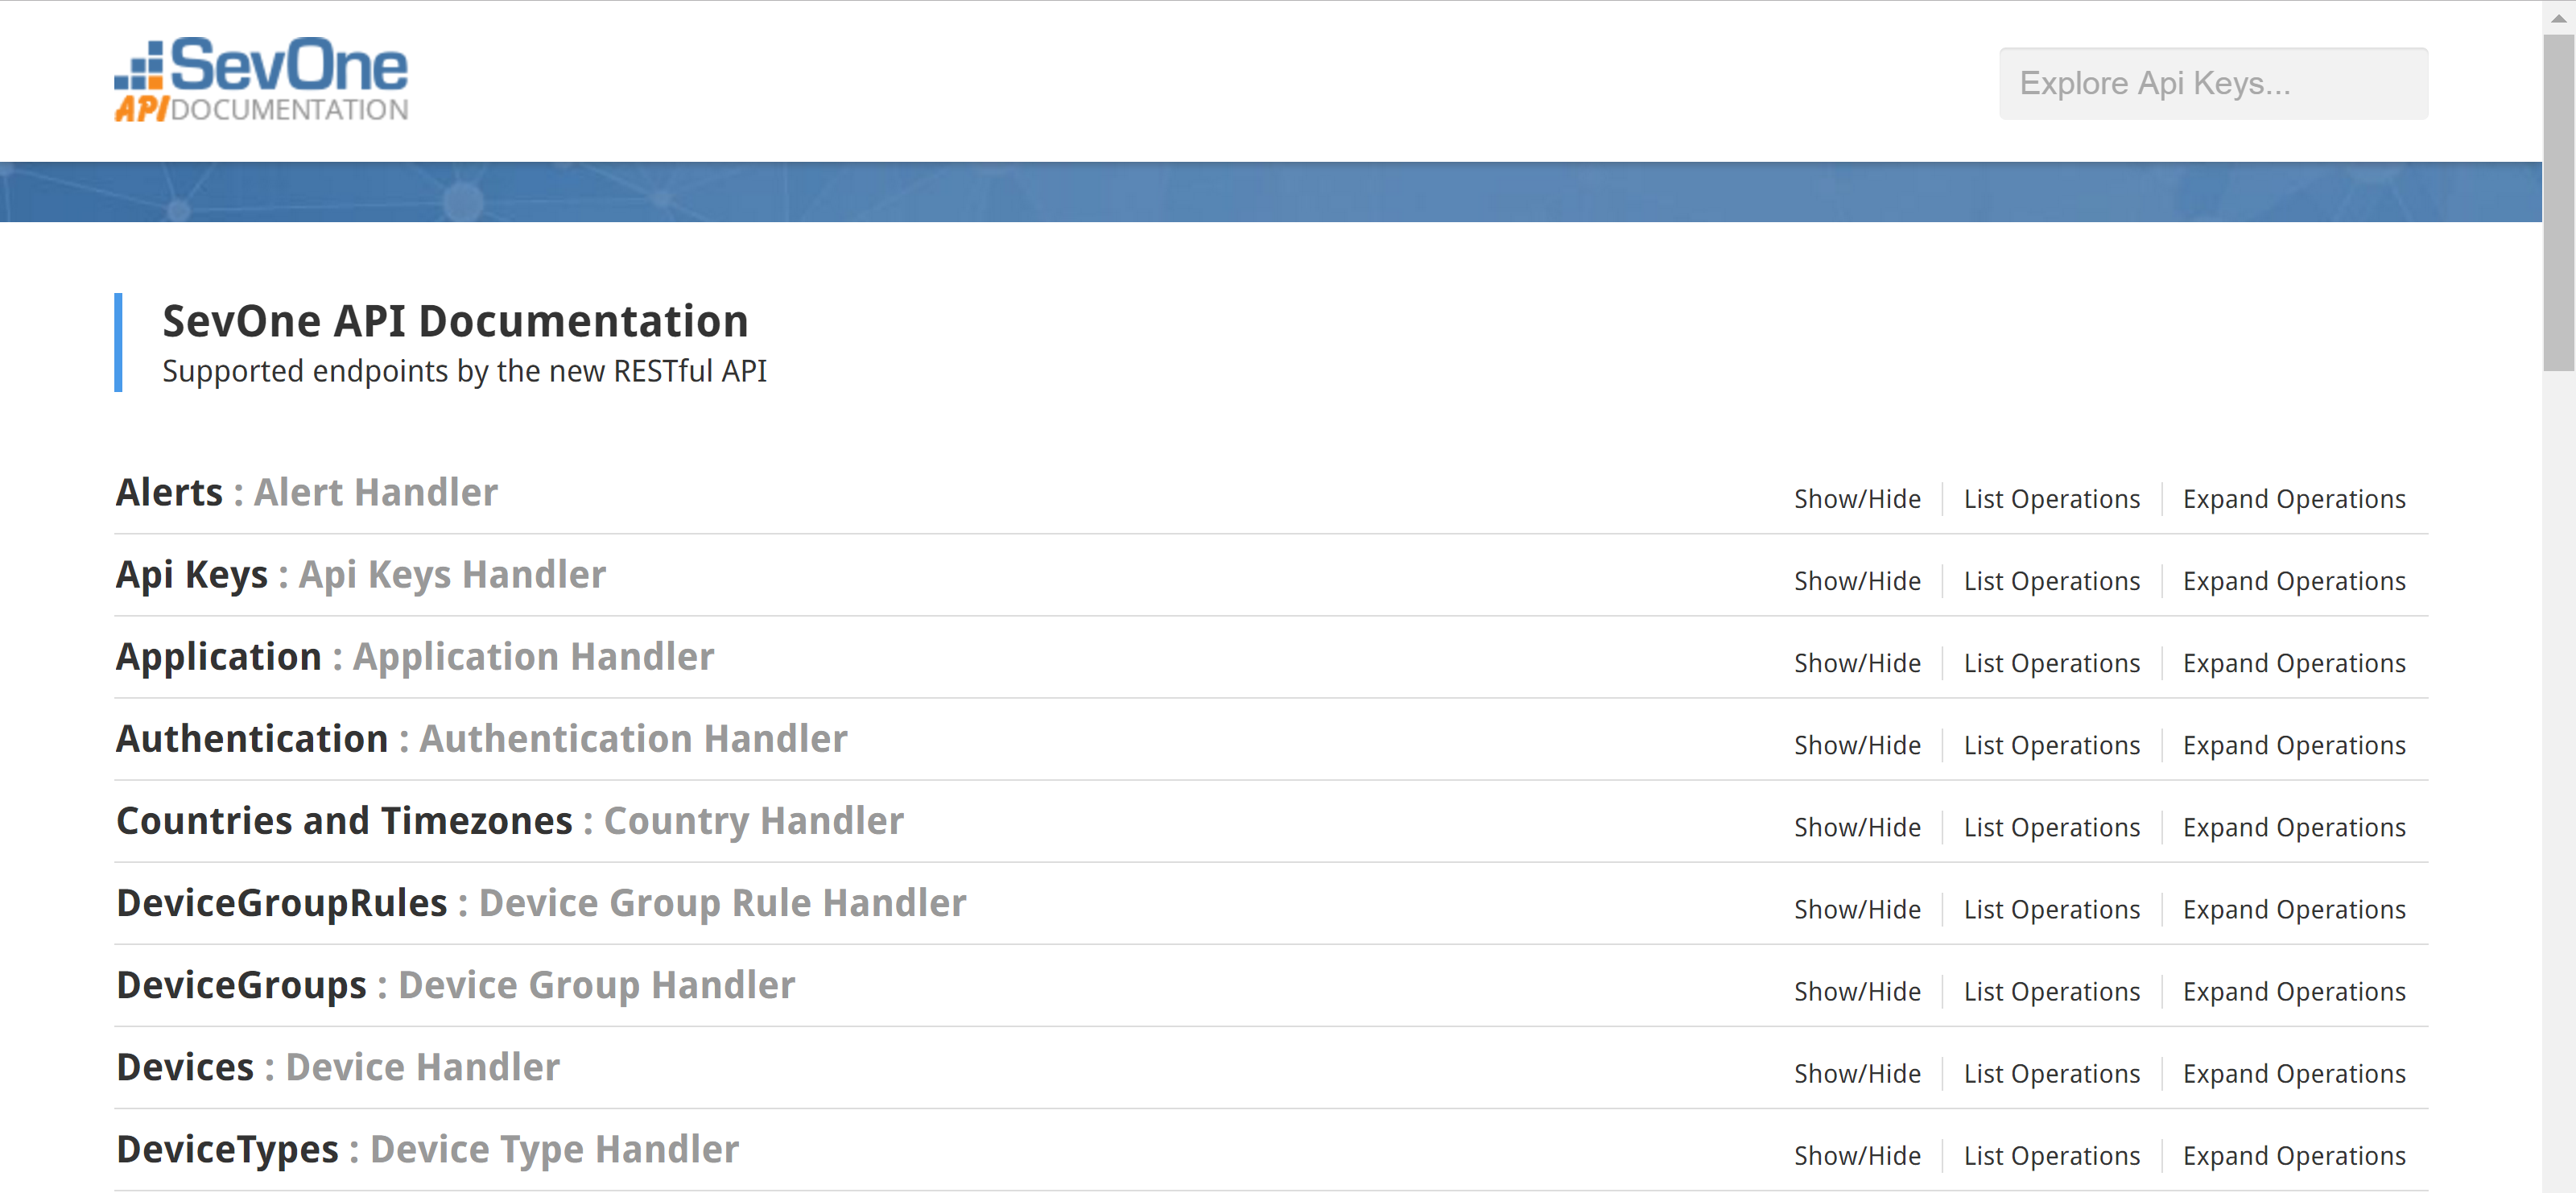
-
You'll see a list of areas. Click on Authentication to view Authentication operations.

-
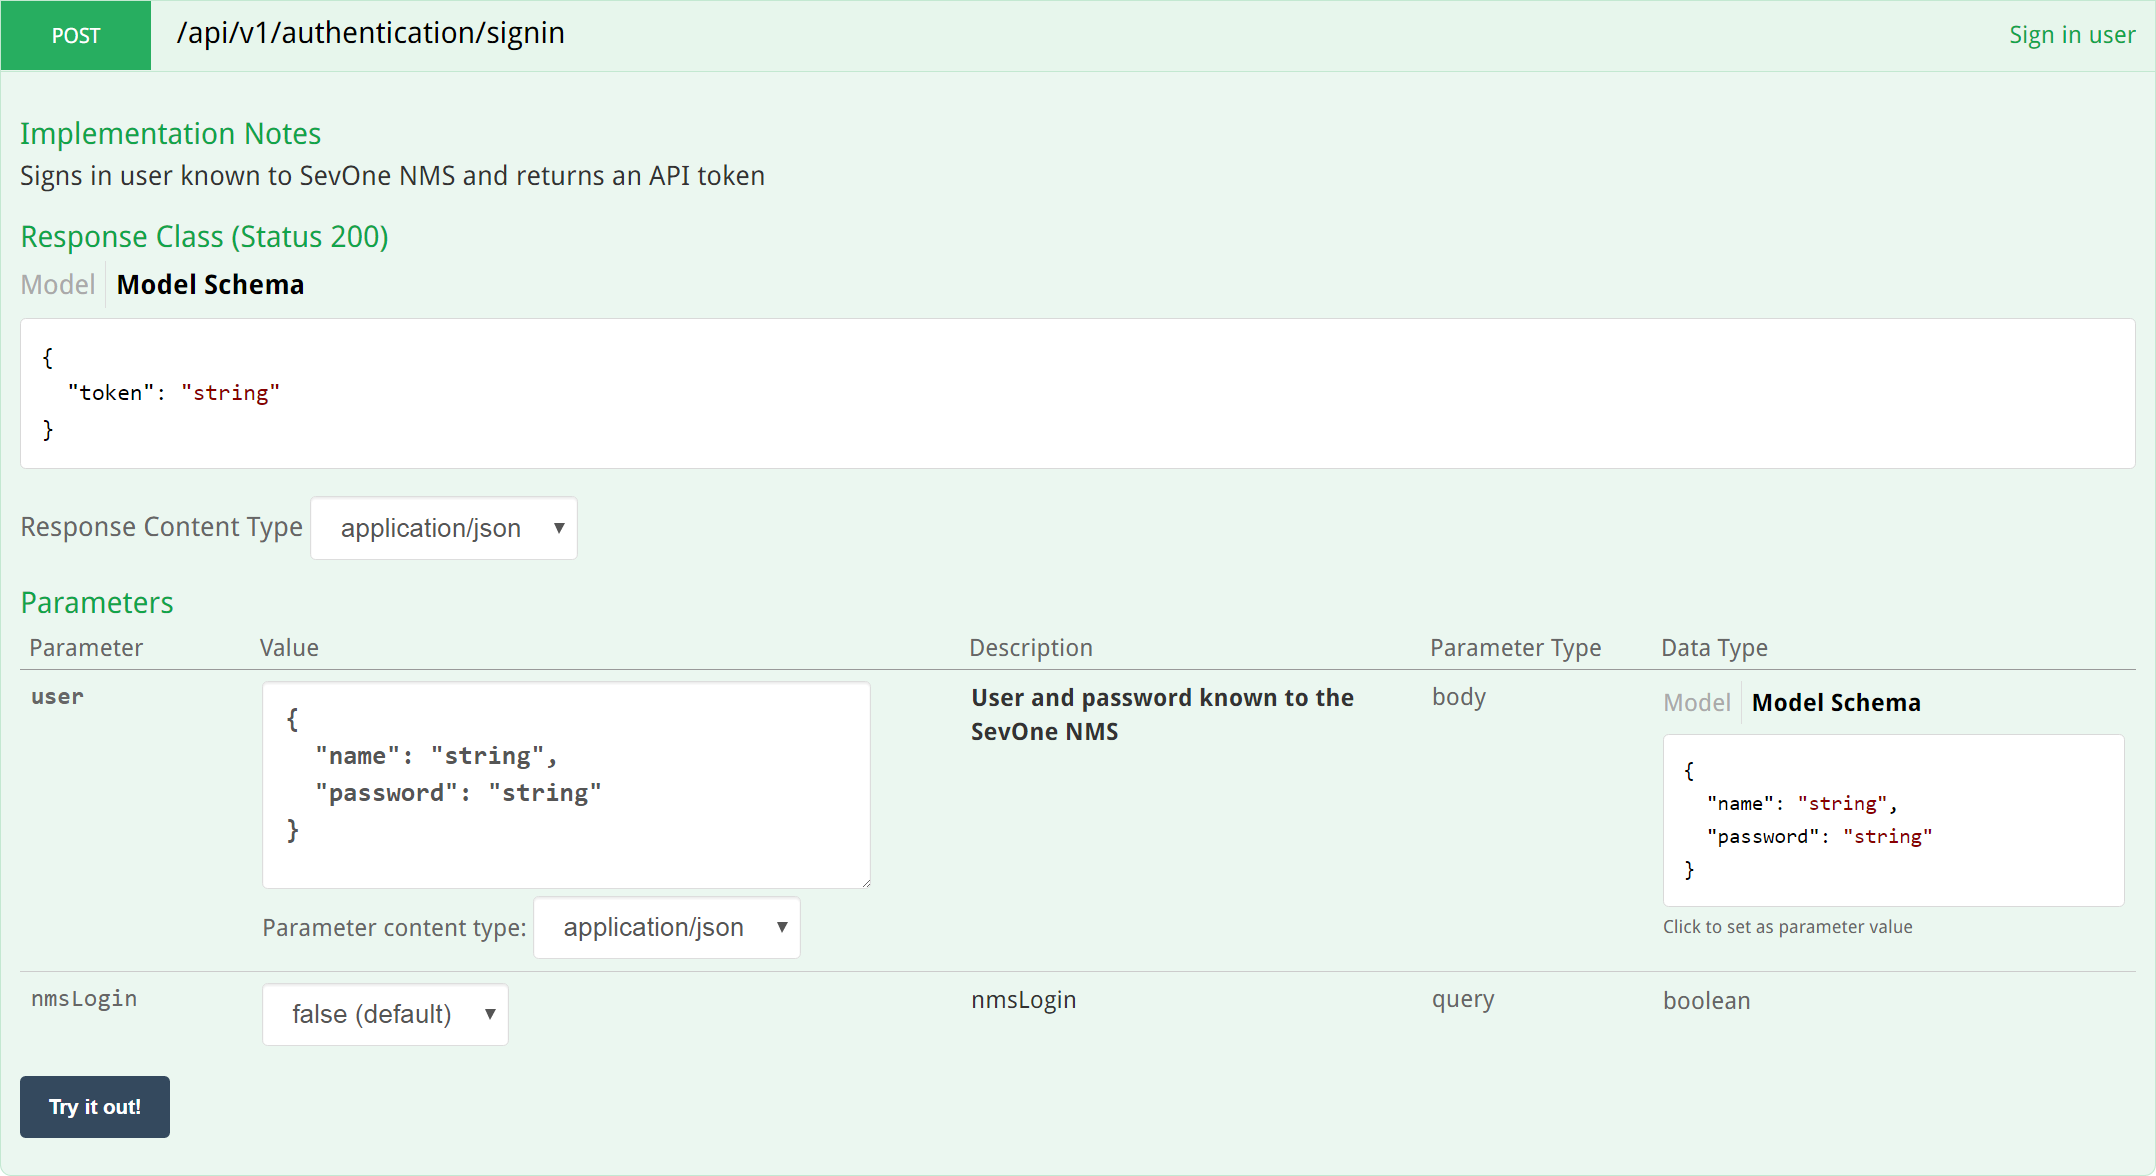
Under Authentication, click on POST.
-
Under Parameters, all the way to the right, locate the Model Schema field. Click on the field to copy its content to the user field.
-
On the left side of the Parameters section, you'll notice that the content now appears in the user field. Perform the following actions in the user field:
-
After "name":, replace string with a SevOne NMS user name . Make sure to enter it within the quotes.
-
After "password":, replace string with the corresponding SevOne NMS password . Make sure to enter it within the quotes.
-
-
Click the nmsLogin drop-down and select one of the following options:
-
true - if the user name and password are also valid for SevOne NMS.
-
false (default) - if the user name and password are not valid for SevOne NMS (but are valid only for the API).
-
-
At the bottom of the POST section, click the Try it out! button.
-
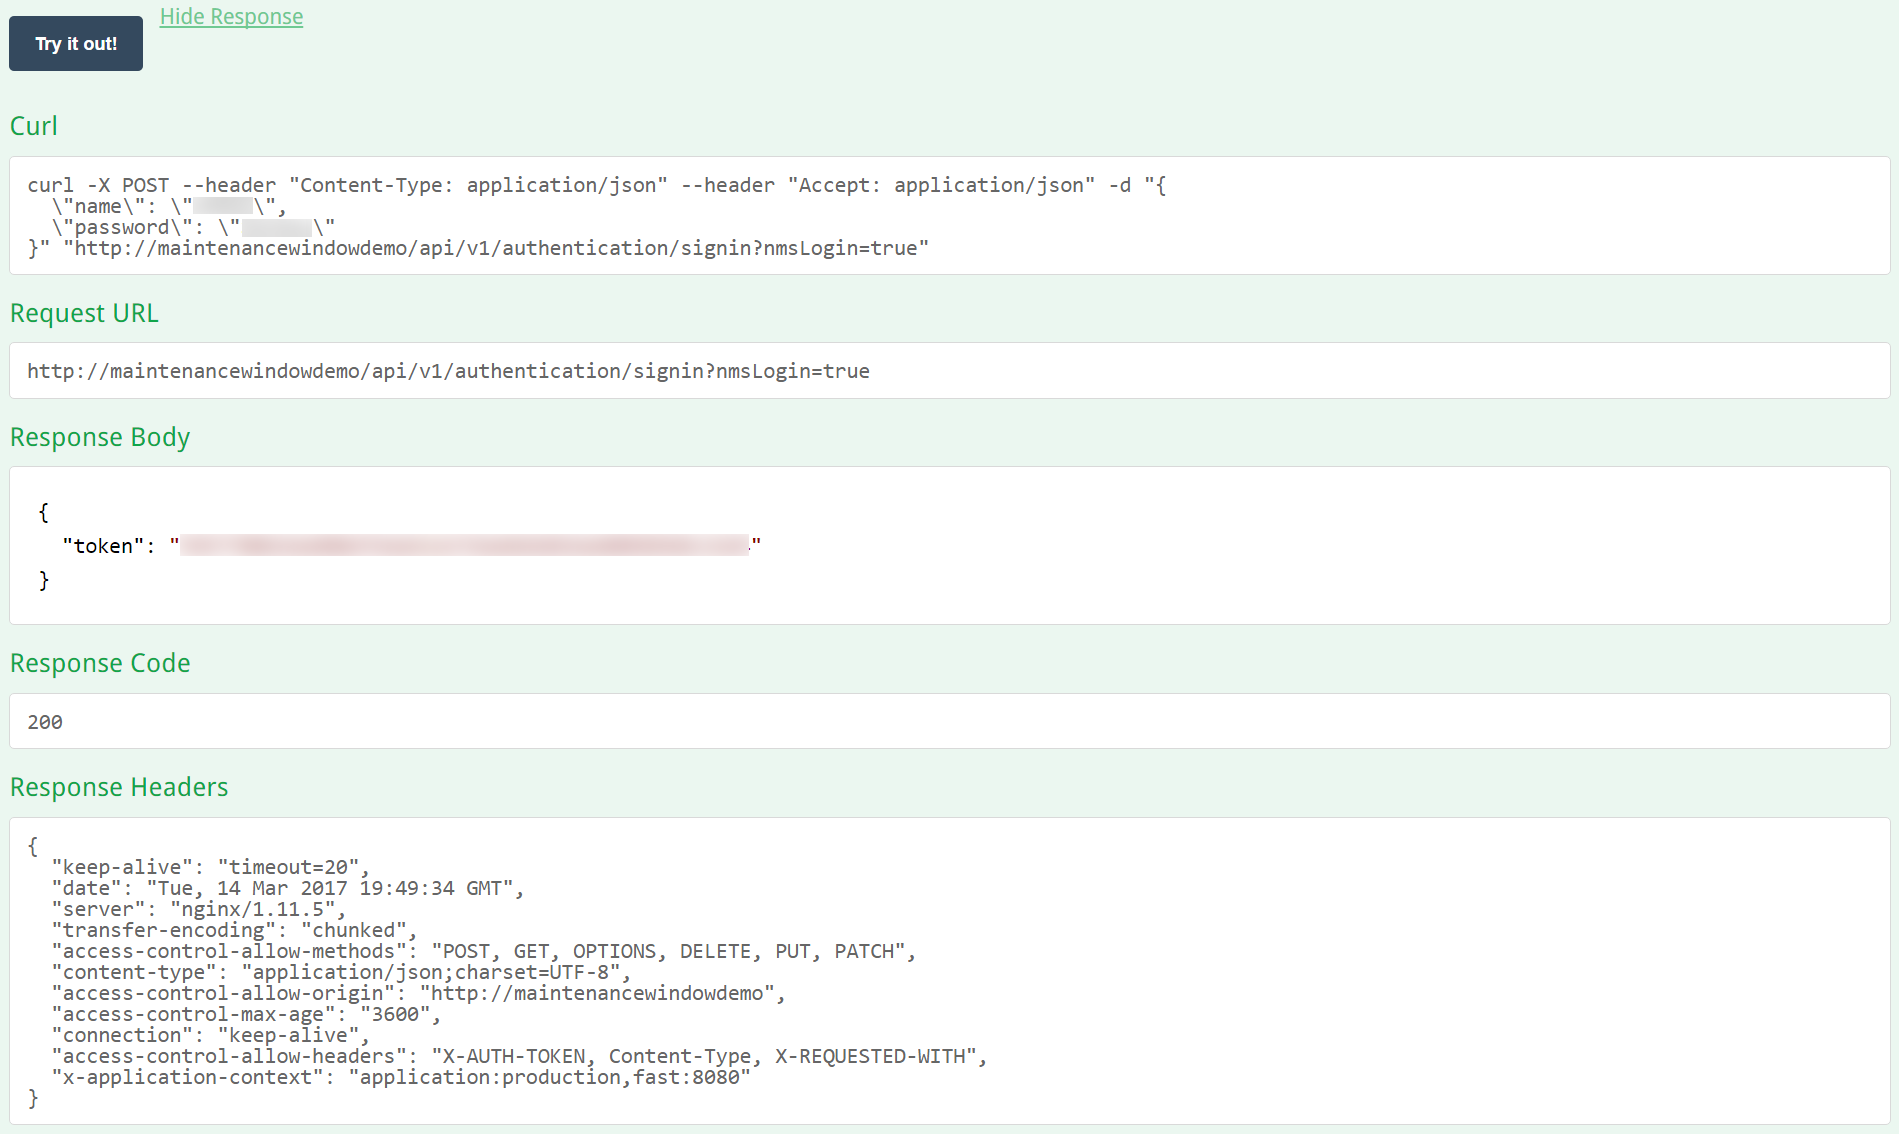
Scroll down to the Response Body field. You should see a long alphanumeric string after "token". This is the token that you need. Double-click the token to select it. Then copy it.
-
In the upper right corner of the SevOne API Documentation page, locate the Explore Api Keys... field. Paste the token into this field. You should now have permissions to perform operations.
Swagger UI Examples
View Devices
First, let's see which devices are on our PAS.
-
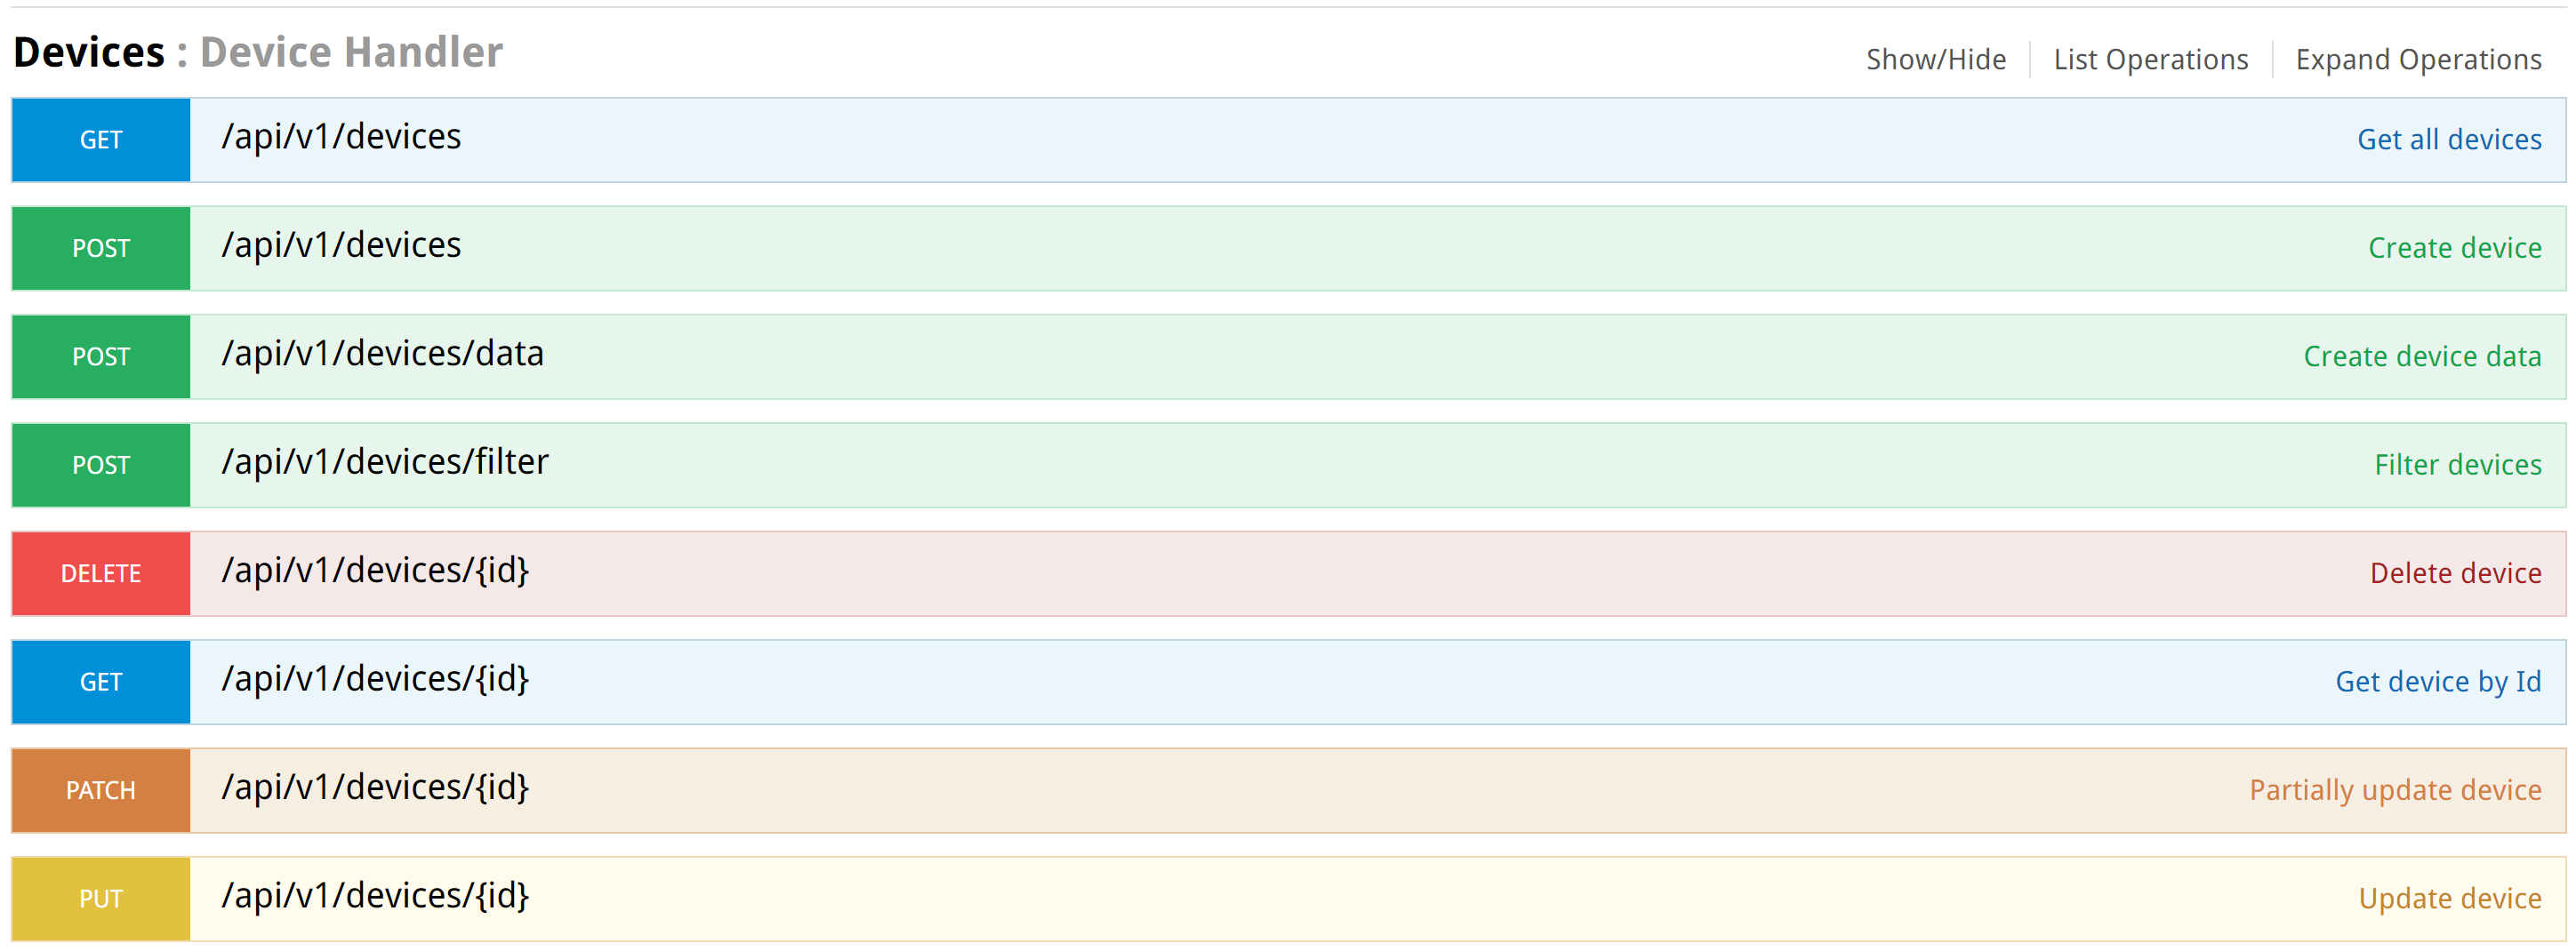
Click on Devices to view Device Handler operations .
-
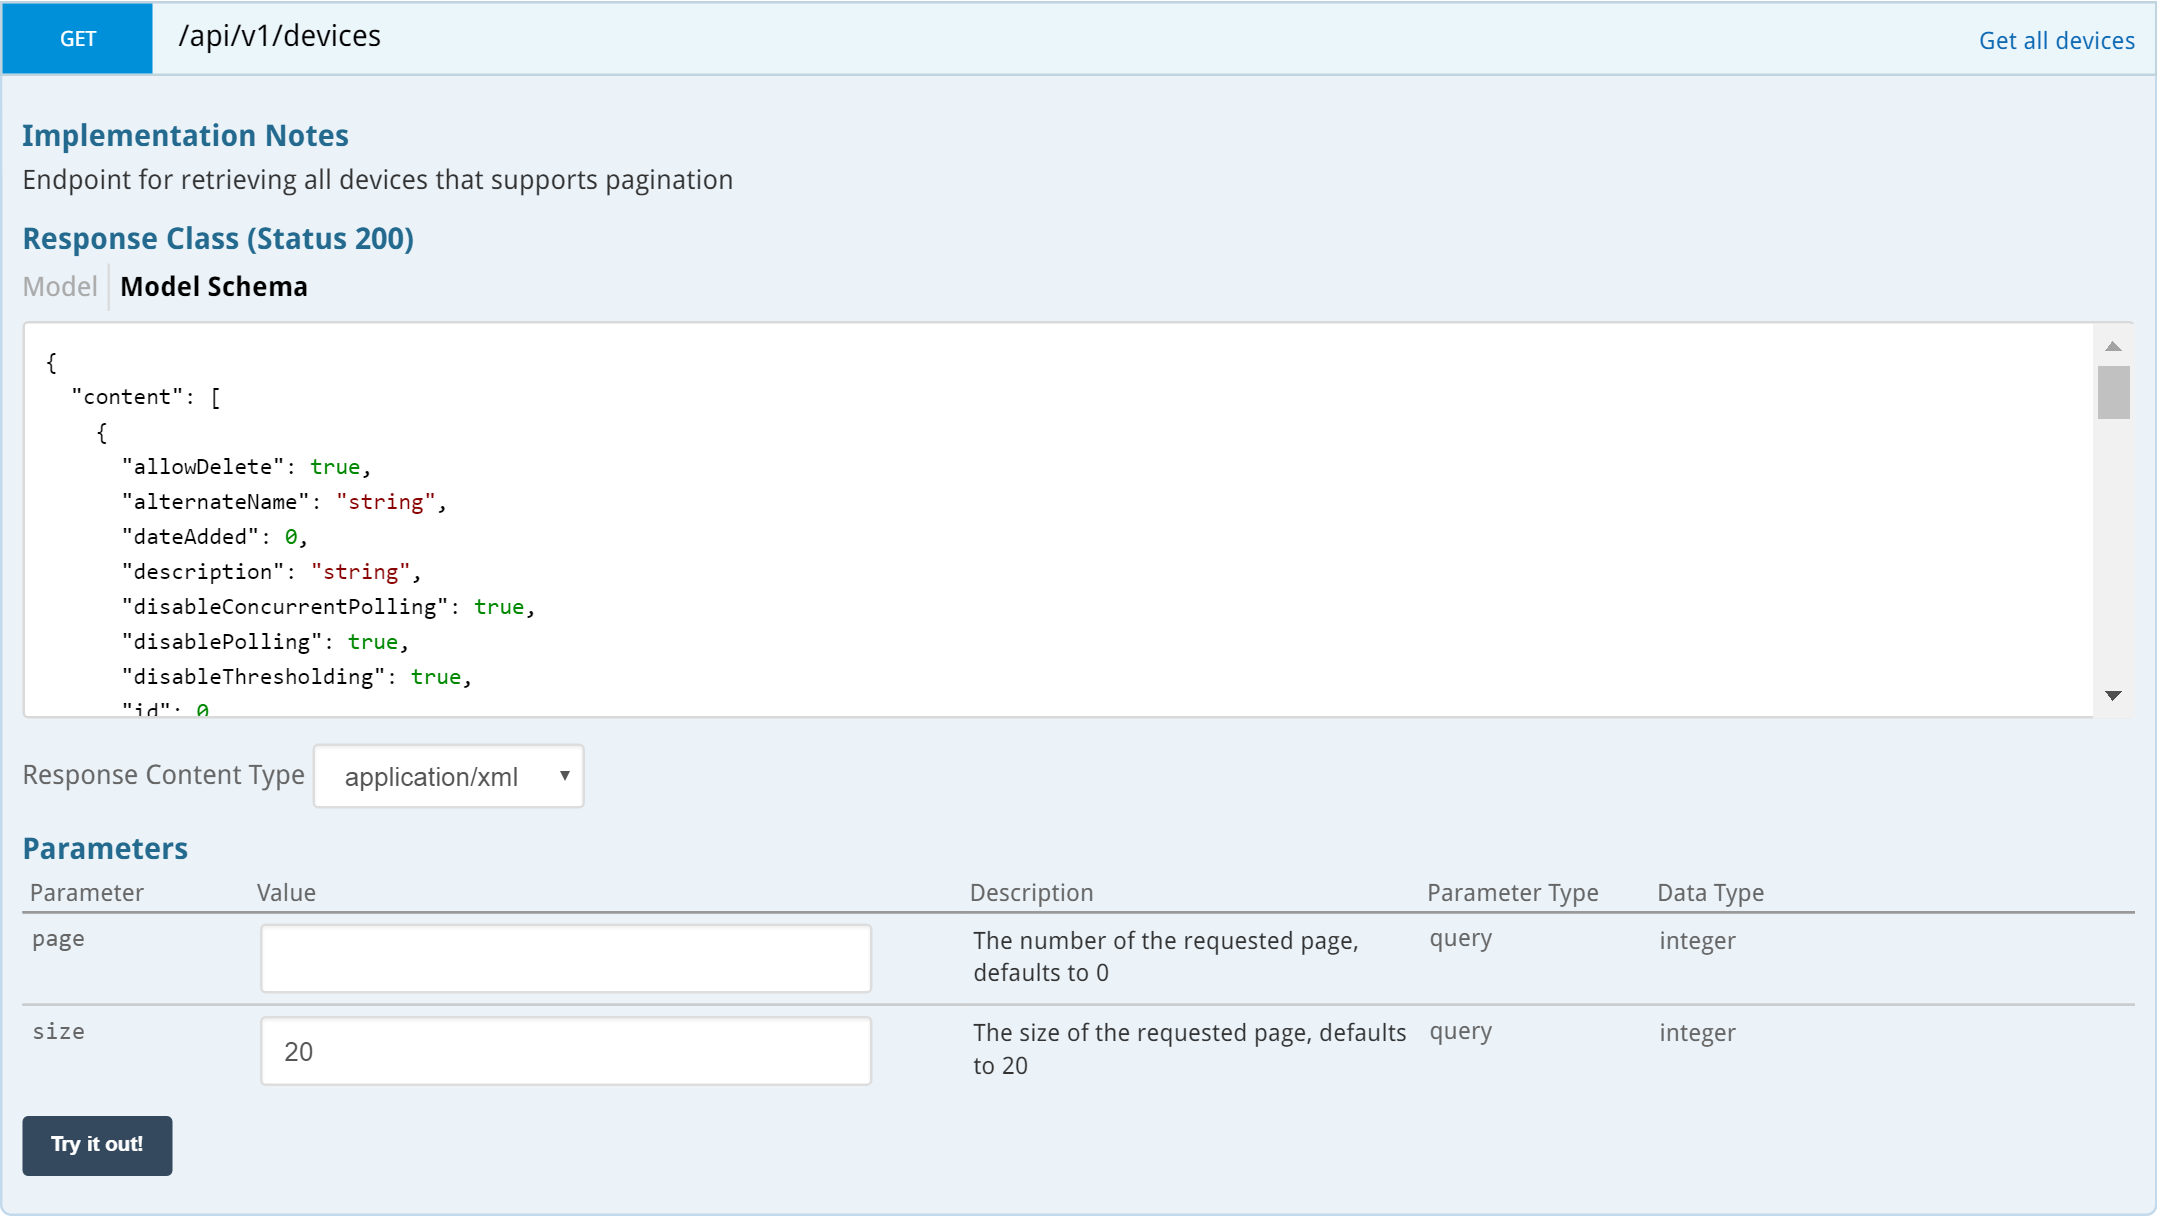
Click on GET (Get all devices).
-
Under Parameters, you can provide input for the following fields. If you don't provide input, the defaults will be applied. For our example, we're going to go with the defaults.
-
page - This field allows you to specify the page that the request applies to.
-
size - This field allows you to specify the number of rows/records/entities for the page.
-
-
Click the Try it out! button.
-
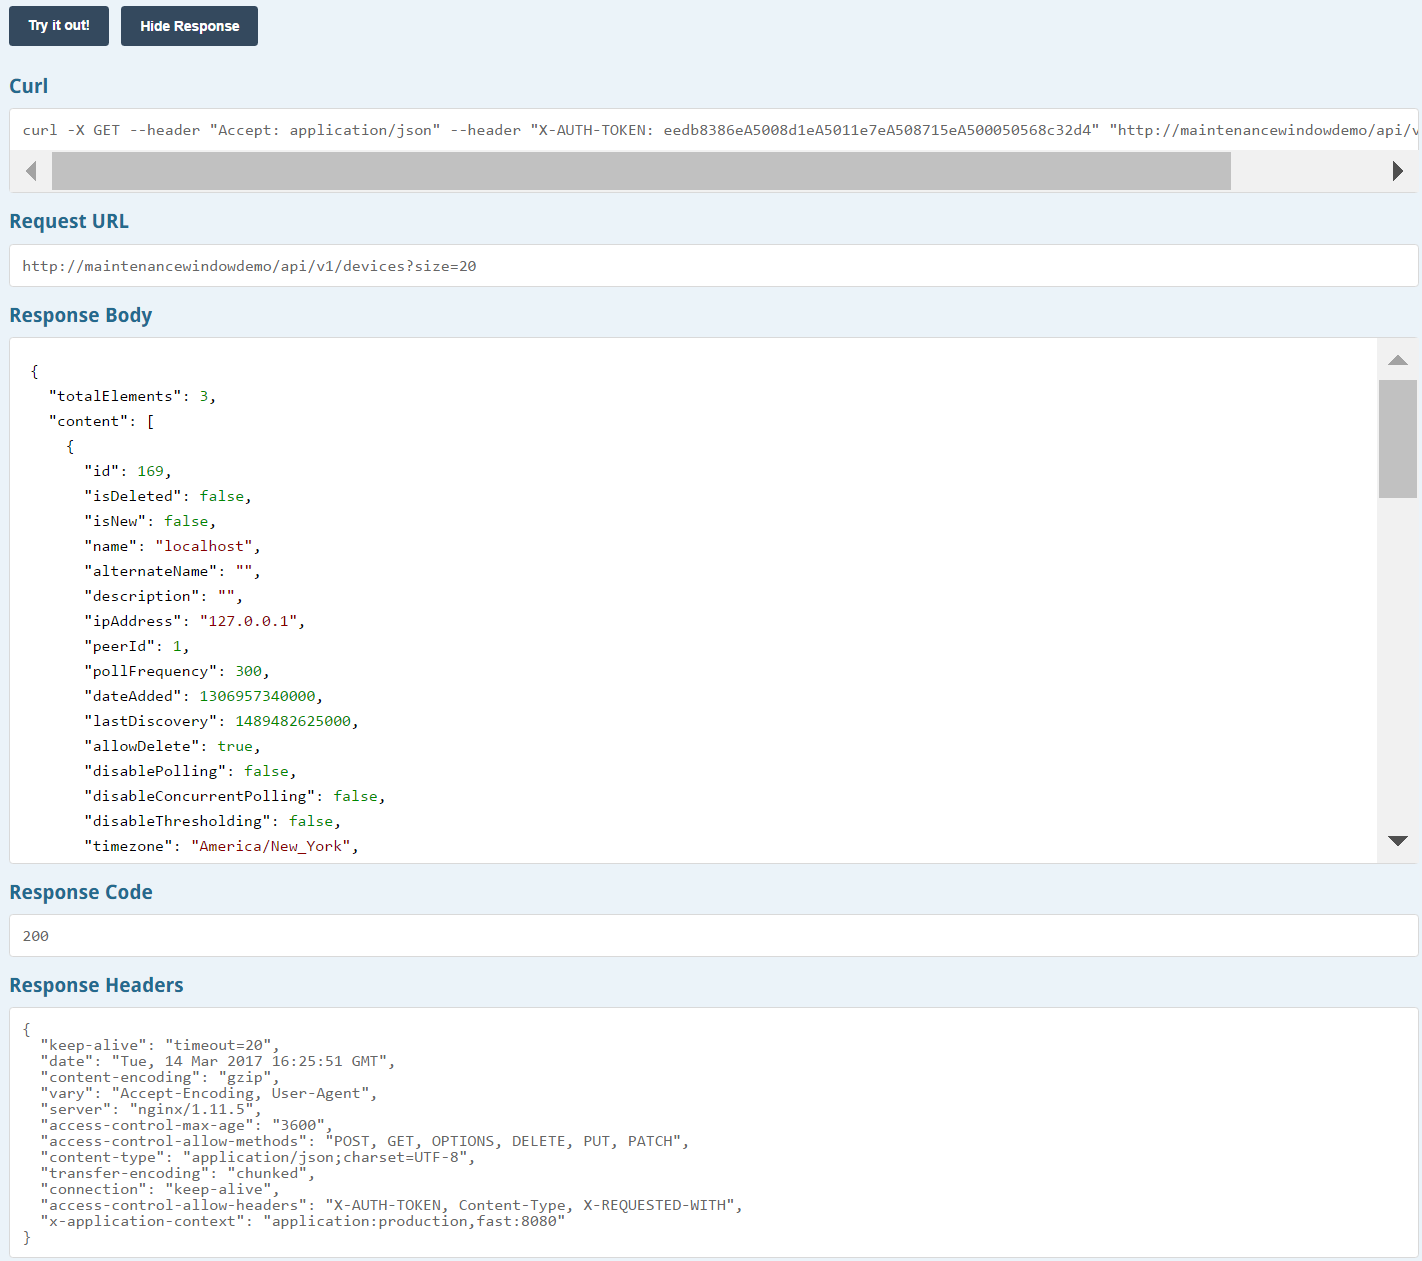
The following fields appear:
-
Curl - The curl command. Notice that the authentication token we used to sign in is included in the command.
-
Request URL - This is the URL that the request is being made to. The Request URL includes the following three components:
-
The protocol (for example, http)
-
The domain/host (for example, 10.129.12.7)
-
The path (for example, /api/v2/devices)
-
The query string (for example, ?size=20).
-
-
Response Body - The response itself. This contains the information that we asked for when we sent the GET request for this example. Since we performed a GET operation for devices, we'll see details for the individual devices on the PAS, such as the device ID, the IP address, the date it was added, its name, etc.
-
Response Code - The HTTP status code . For example, 200 indicates that things are okay. 500, on the other hand indicates an error.
-
Response Headers - The HTTP header for the API response. This is used to communicate the response code, content type, etc.
-
Add a Device
Now let's try creating a device. Perform the following steps to add a device to SevOne NMS.
-
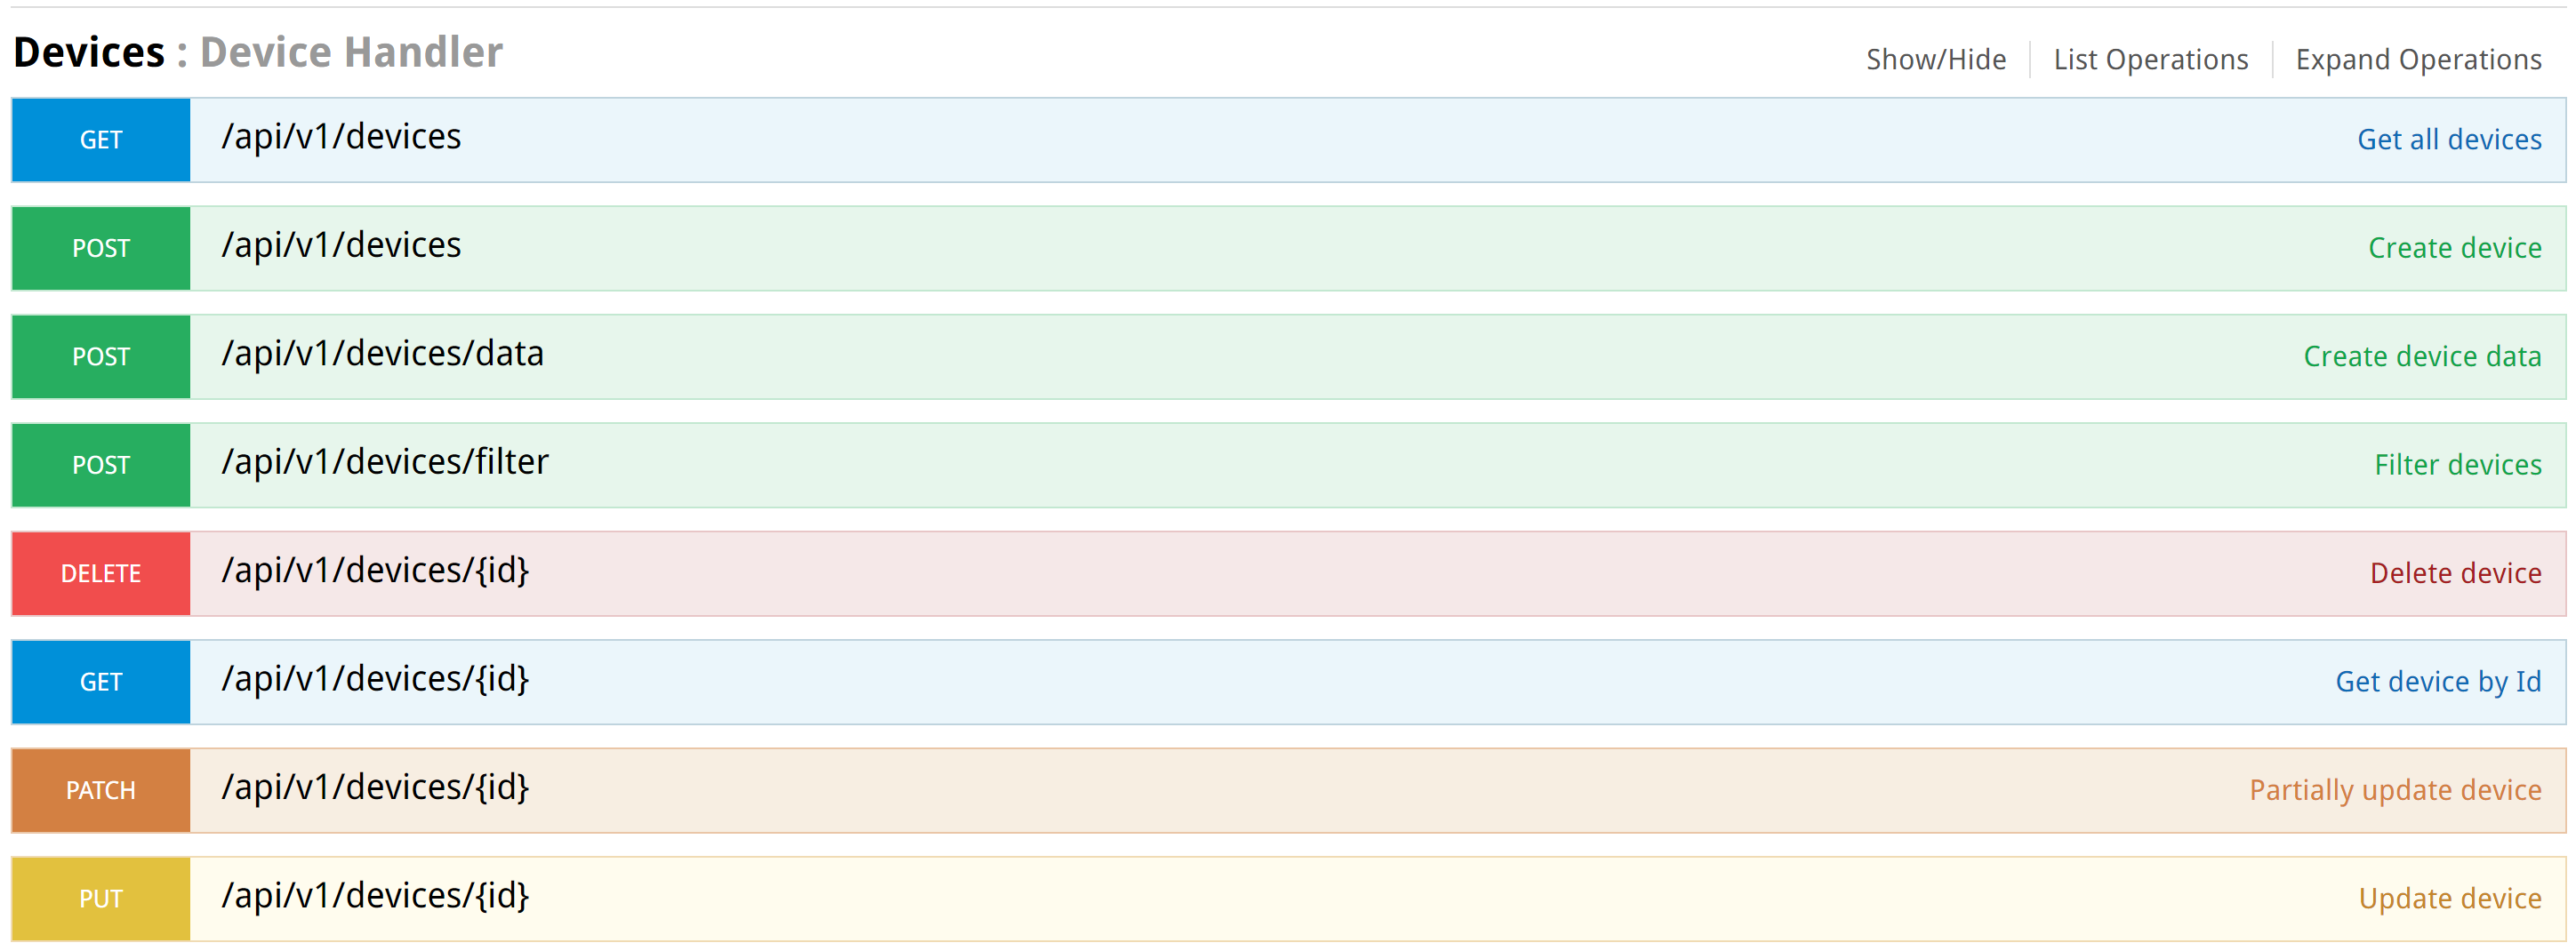
If you haven't already done so, click on Devices to view Device Handler operations.
-
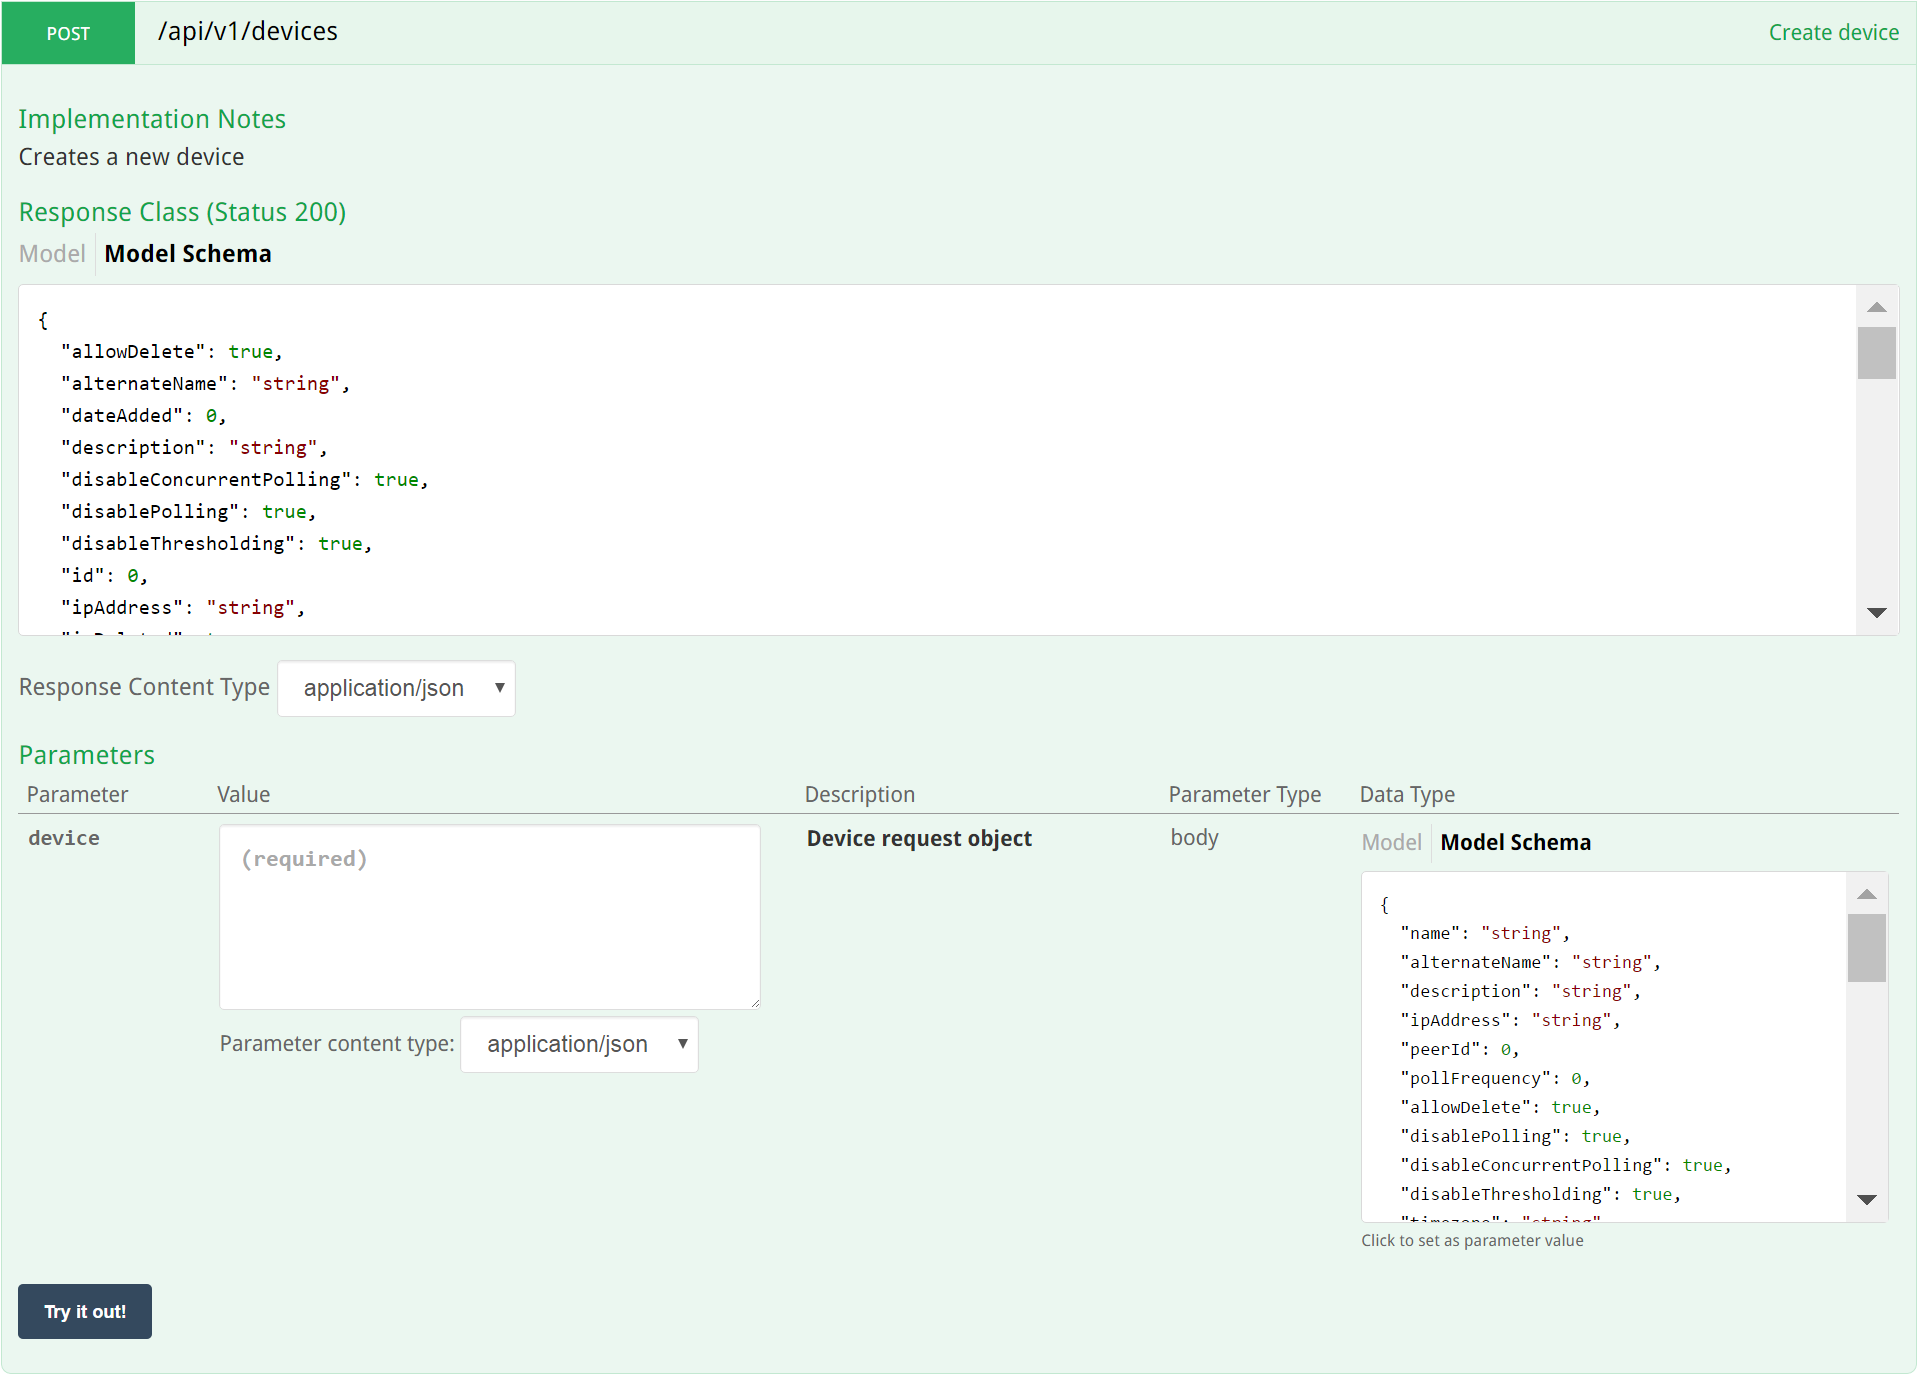
Click on POST (Create device).
-
Under Parameters, all the way to the right, locate the Model Schema field. Click on the field to copy its content to the device field.

-
On the left side of the Parameters section, you'll notice that the content now appears in the device field. You'll need to provide input for the following settings, at the very least, in order to create your new device. Otherwise, you may receive error messages.
-
name - The name you give to the device that you're adding.
-
ipAddress - The IP address of the device that you're adding.
-
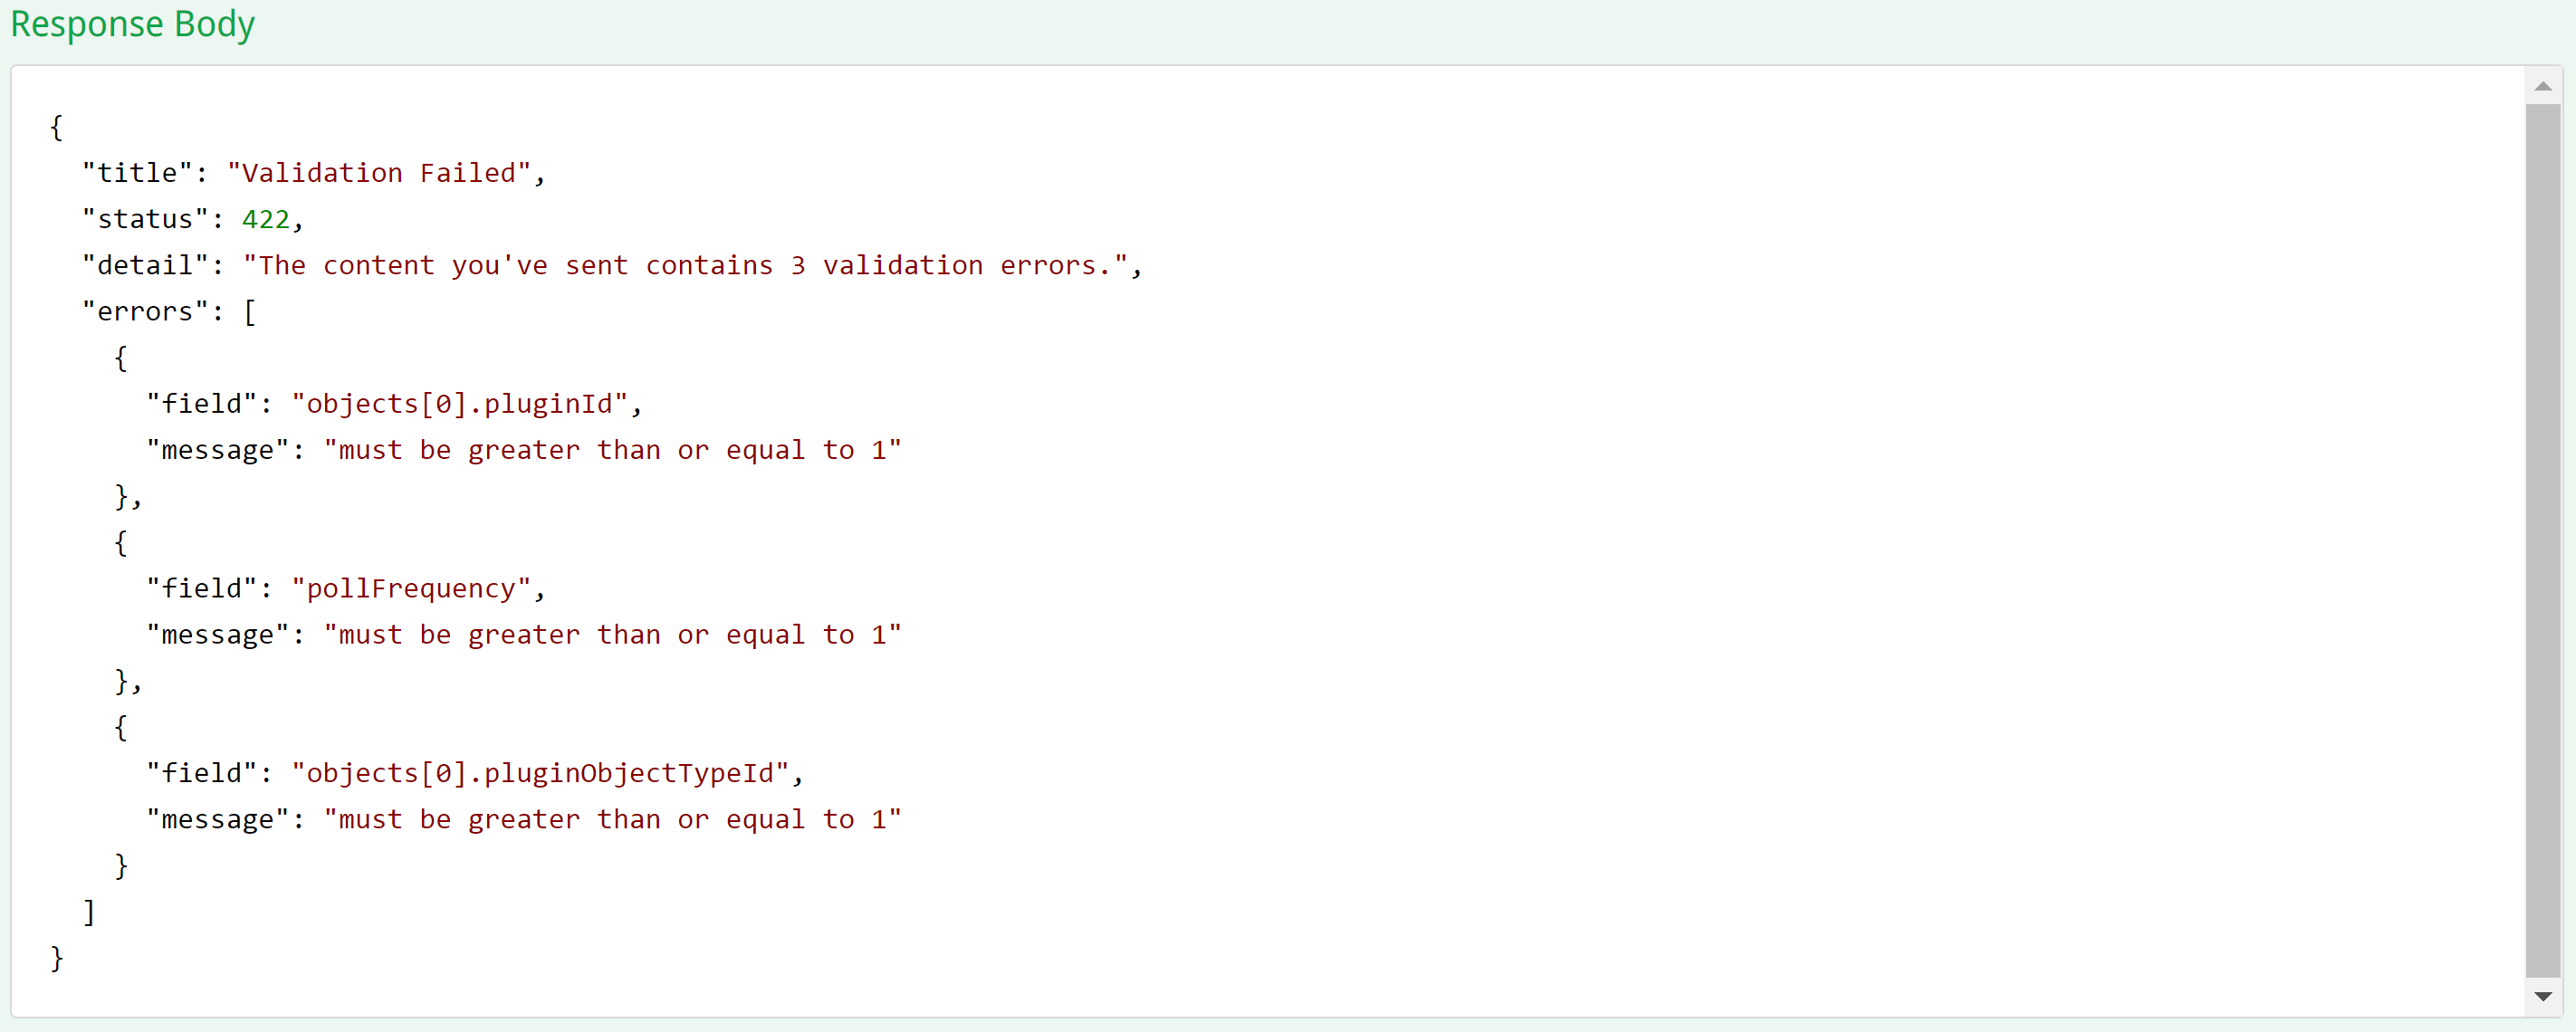
pollFrequency - The polling frequency of the device in seconds. This must be a number greater than 0.
-
timezone - The timezone of the device.
-
objects -> pluginId - A plugin ID. This must be a number greater than 0.
-
objects -> pluginObjectTypeId - A plugin object type ID. This must be a number greater than 0.
If there's a problem performing an operation–such as creating a device, for example–you'll see information about any errors in the Response Body field.
-
-
Once you've created your device, go to the SevOne NMS Device Manager (Devices -> Device Manager) to confirm that it's there.

Generating a Client SDK with Swagger Editor
Using the Swagger Editor, you can generate a client SDK in the language of your choice based on the SevOne API.
Perform the following steps to generate a client SDK .
-
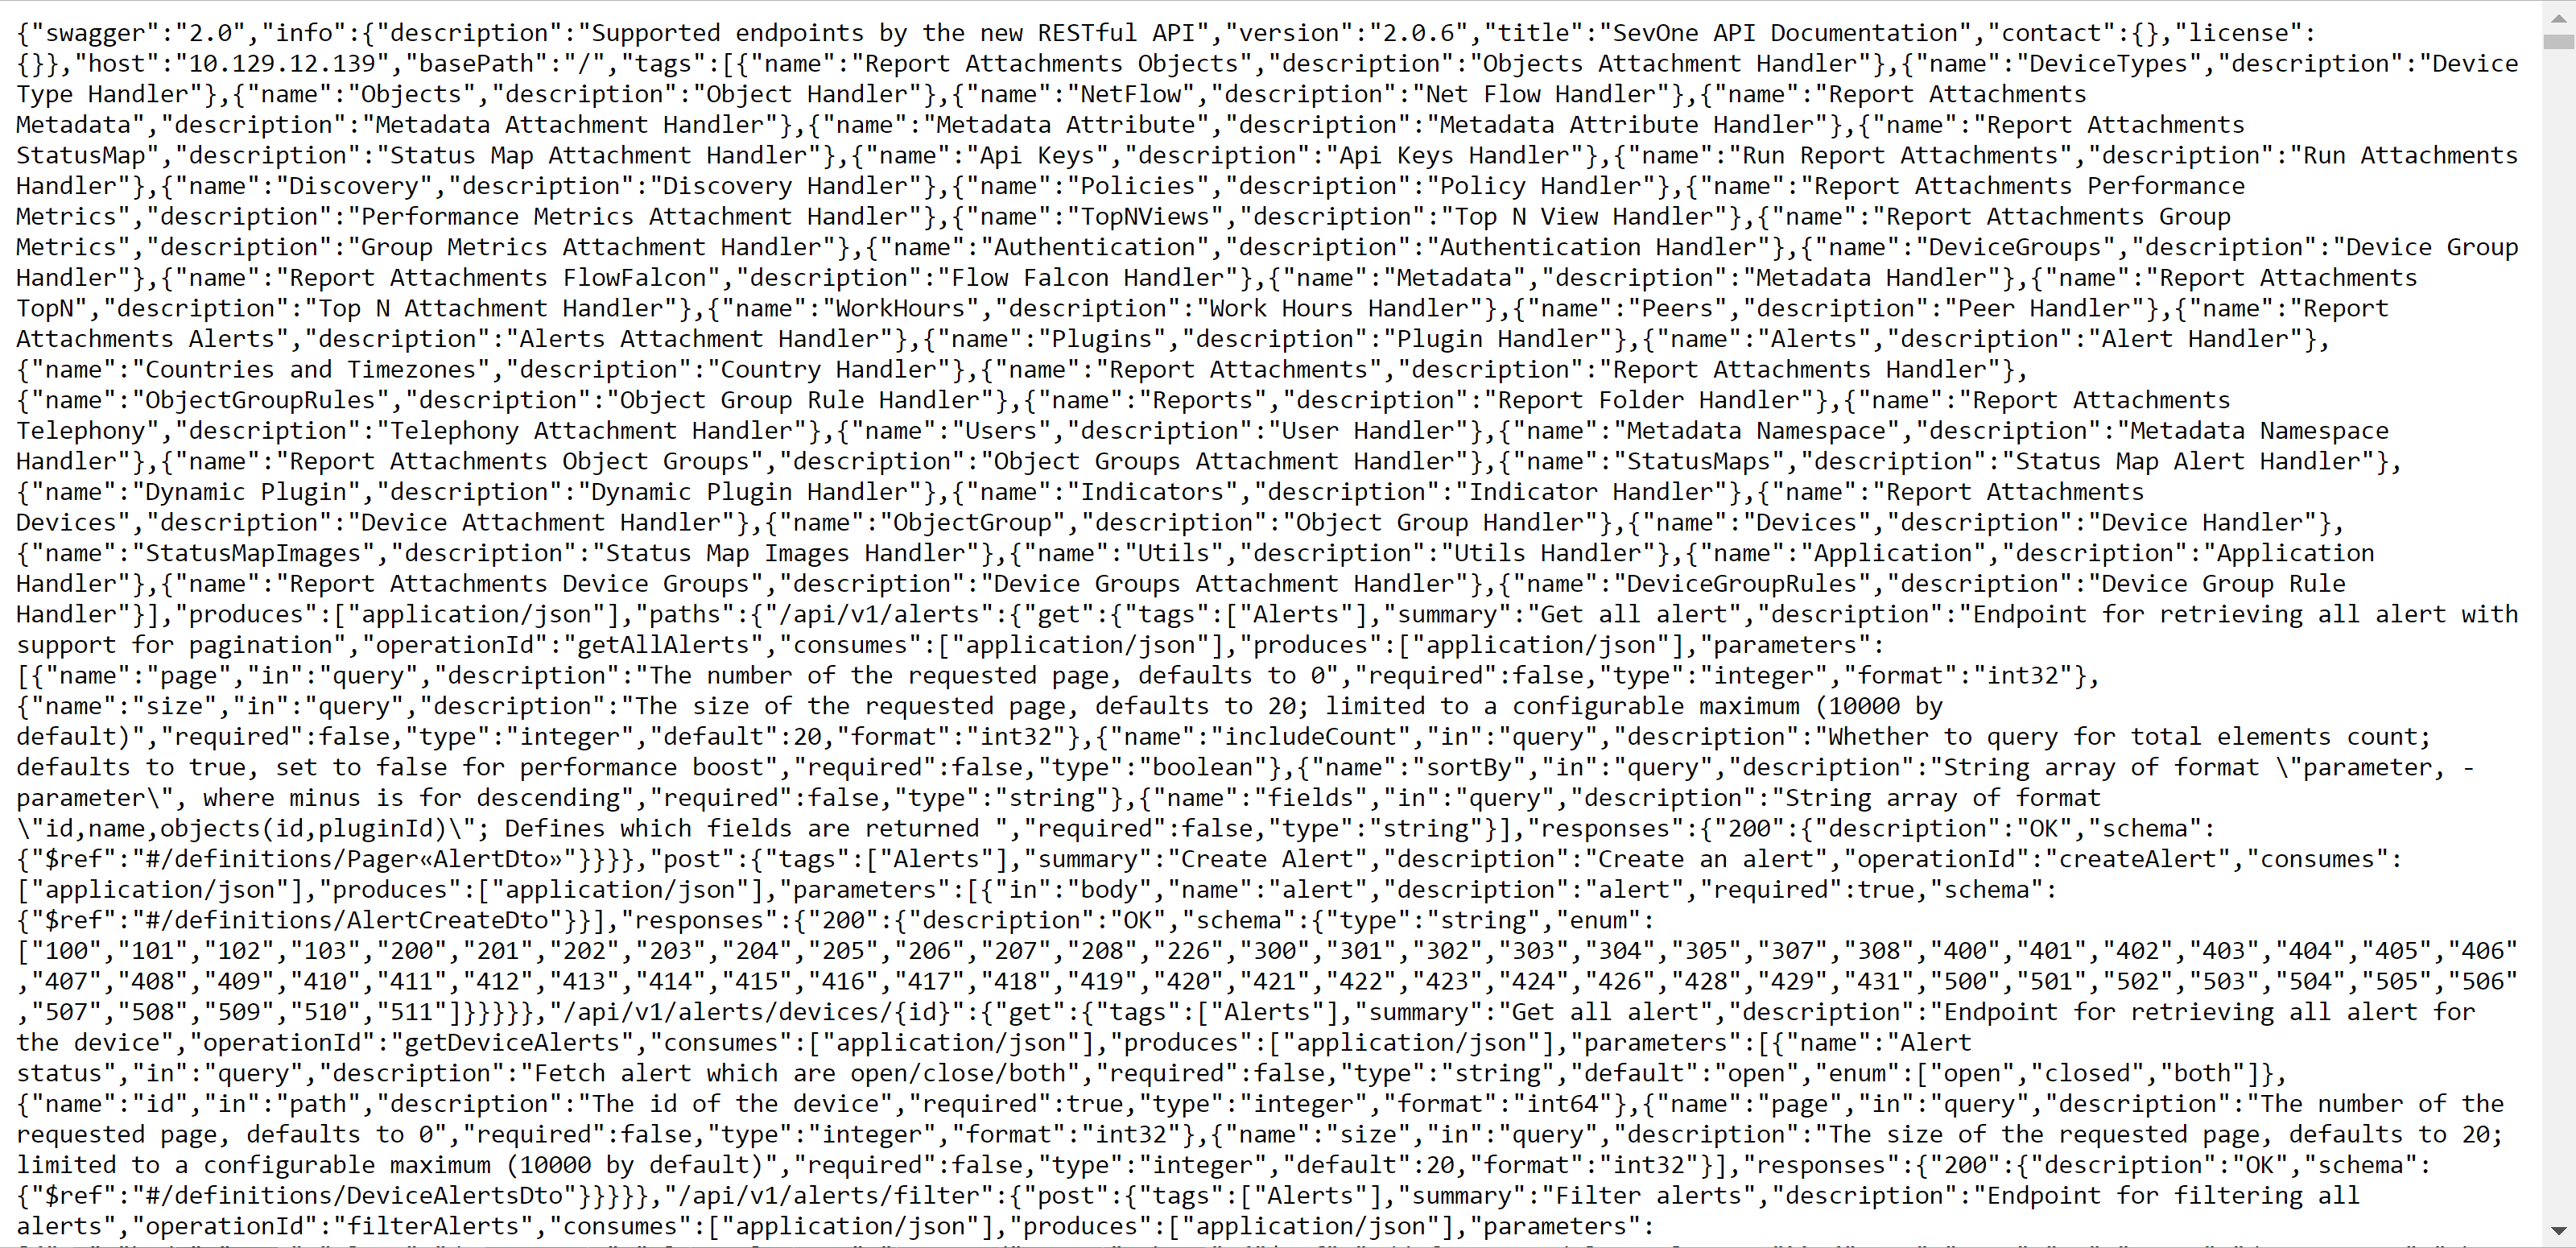
First you'll need to export the REST API schema definition.
-
Go to http://<PAS hostname or IP address>/api/v2/api-docs.
-
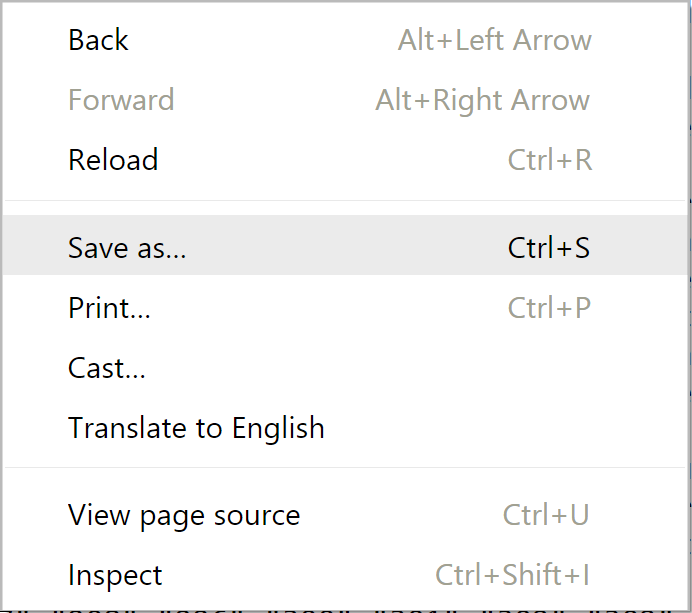
Right-click anywhere on the page and select Save as….
-
Save the file as <filename>.json.
-
-
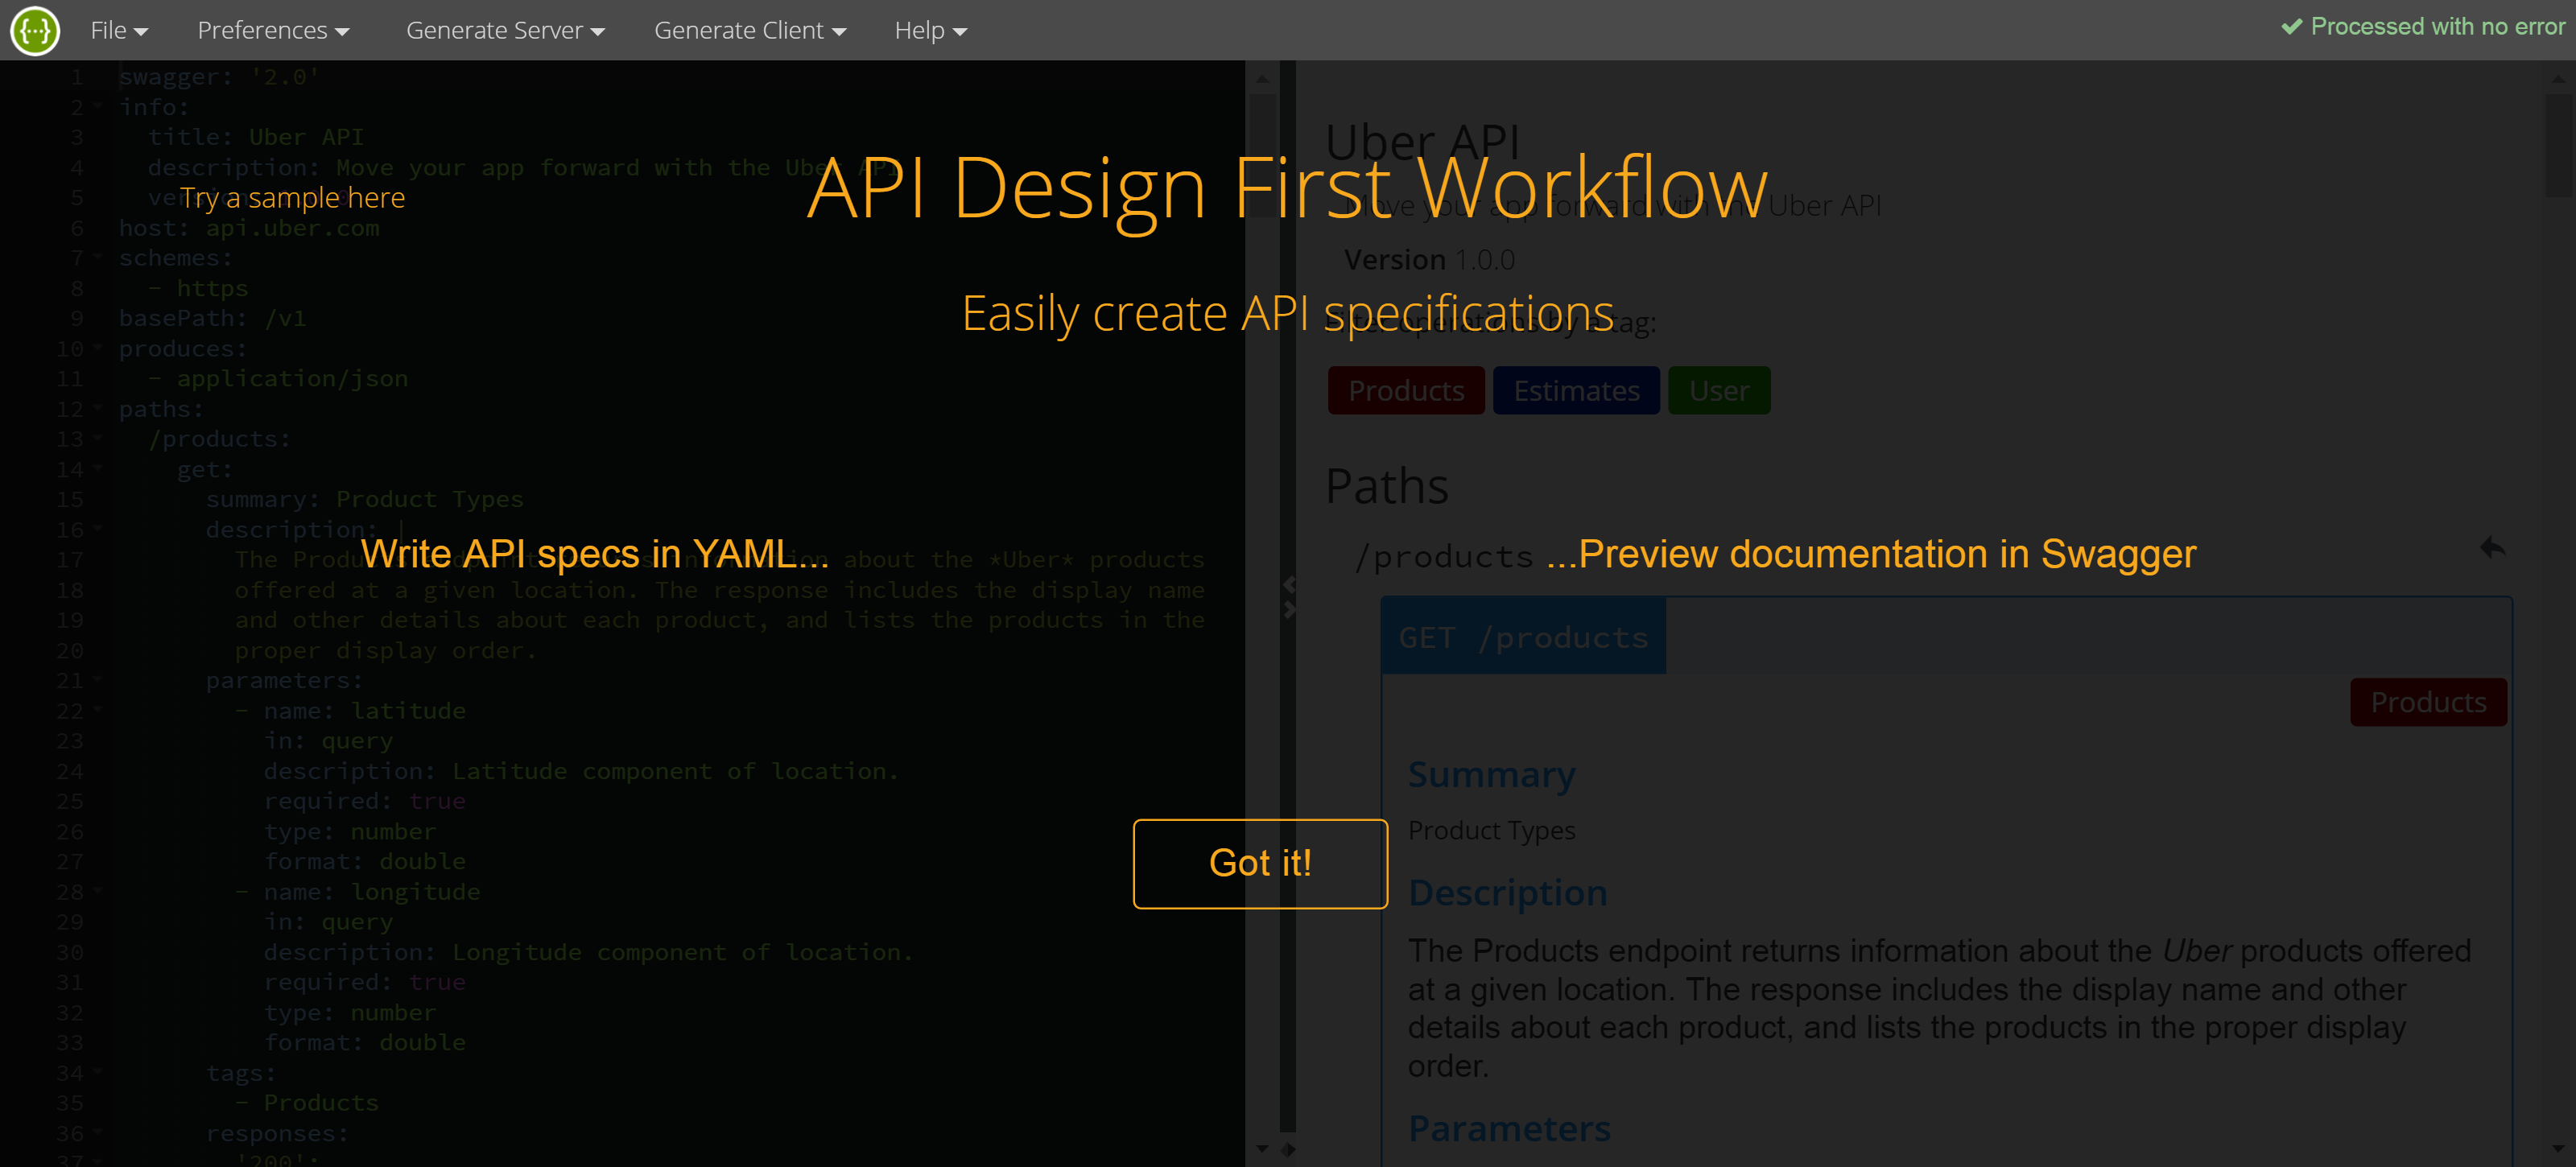
Now go to the Swagger Editor at http://<PAS hostname or IP address>/api/swagger-editor/index.html#.
-
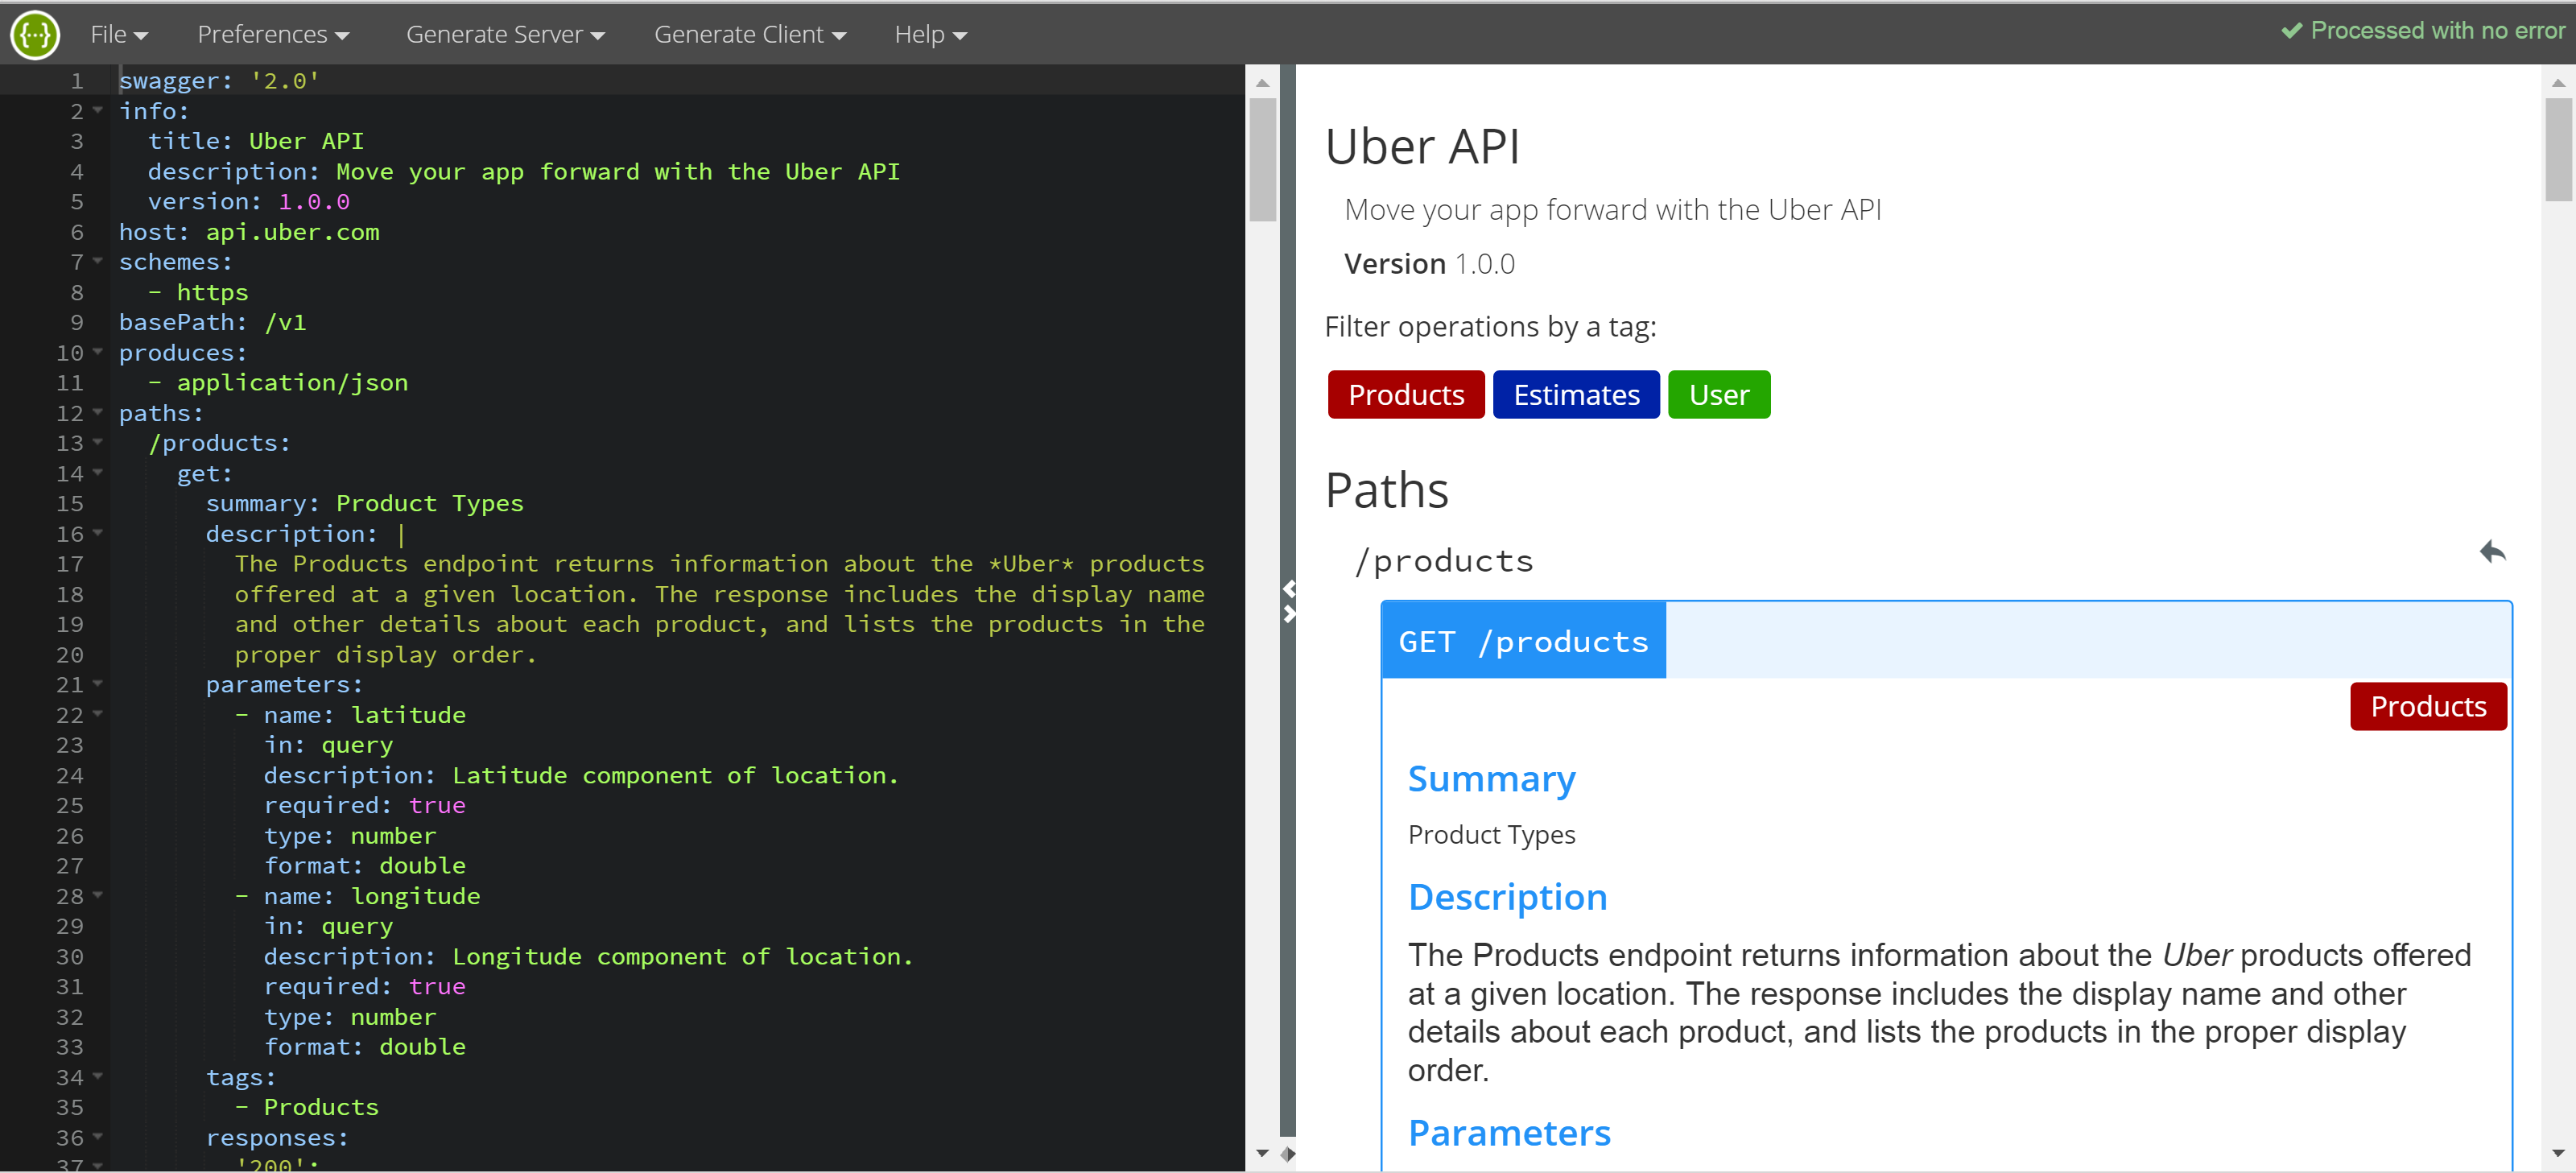
Click the Got it! button. You'll notice that the SevOne API does not appear. Continue with the steps below.
-
Perform the following actions to import the RESTful API schema definition .json file.
-
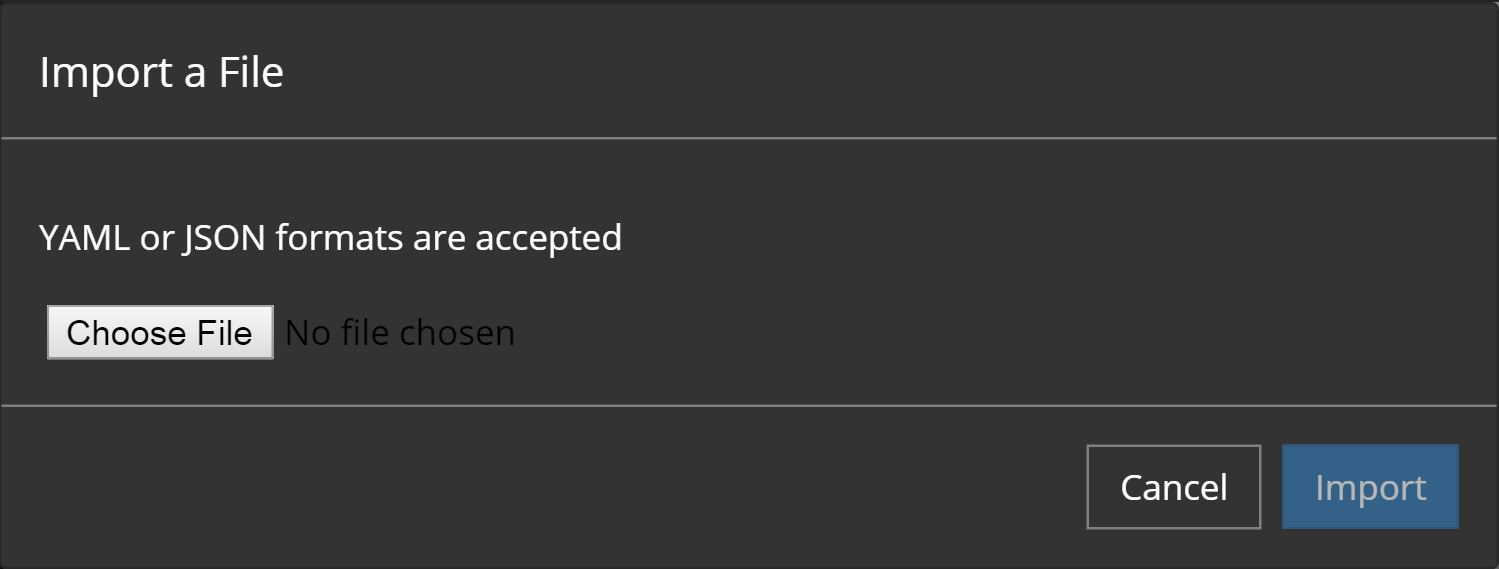
In the upper left corner or the page, click File and select Import File... to display a pop-up.
-
Click Choose File.
-
Navigate the folder structure and select the .json file to upload. Then click Import.
-
-
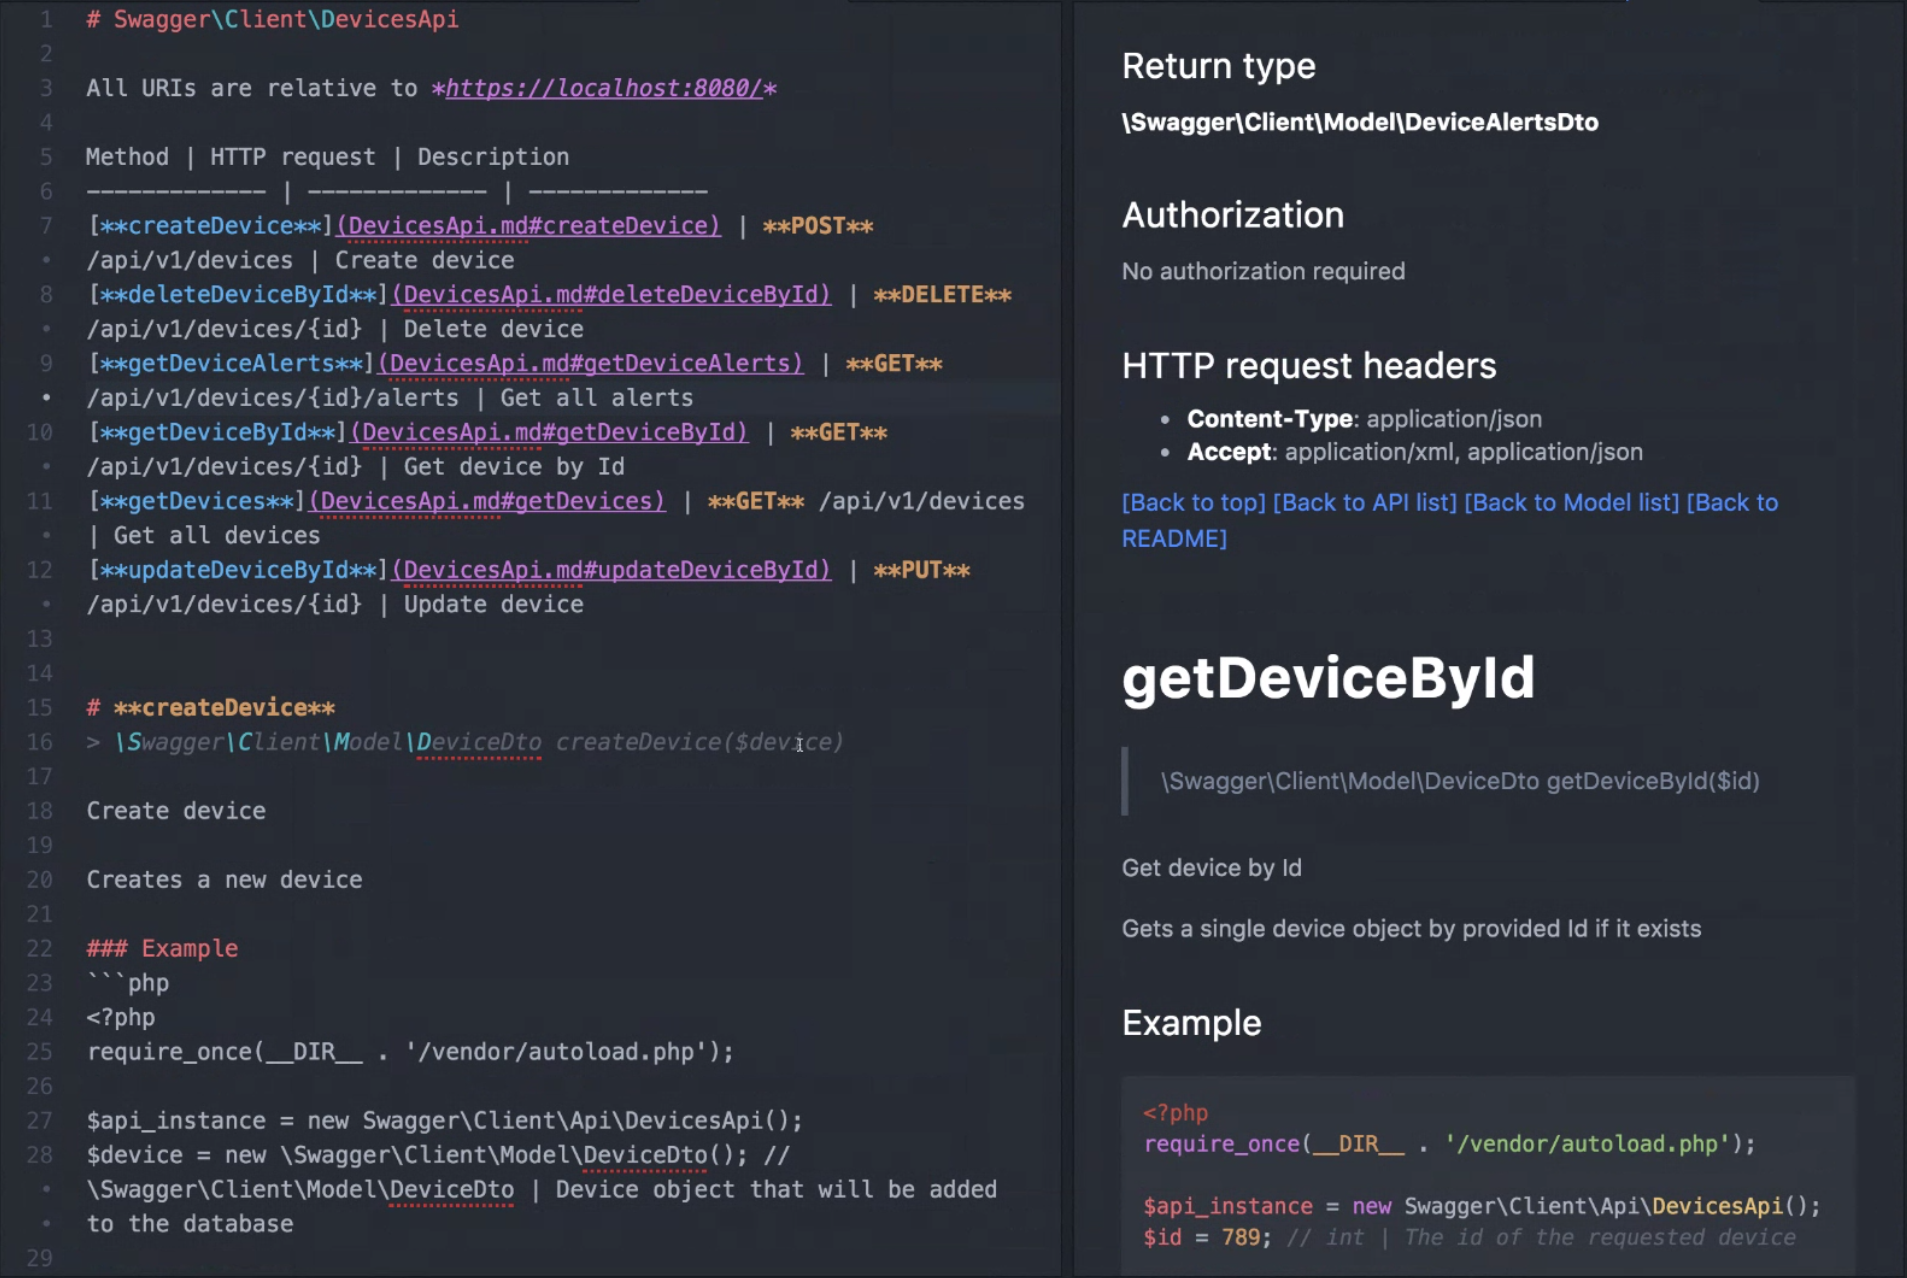
After a few seconds, you should see the SevOne API Documentation. The documentation appears on the right side of the page. On the left is the documentation in markdown format.
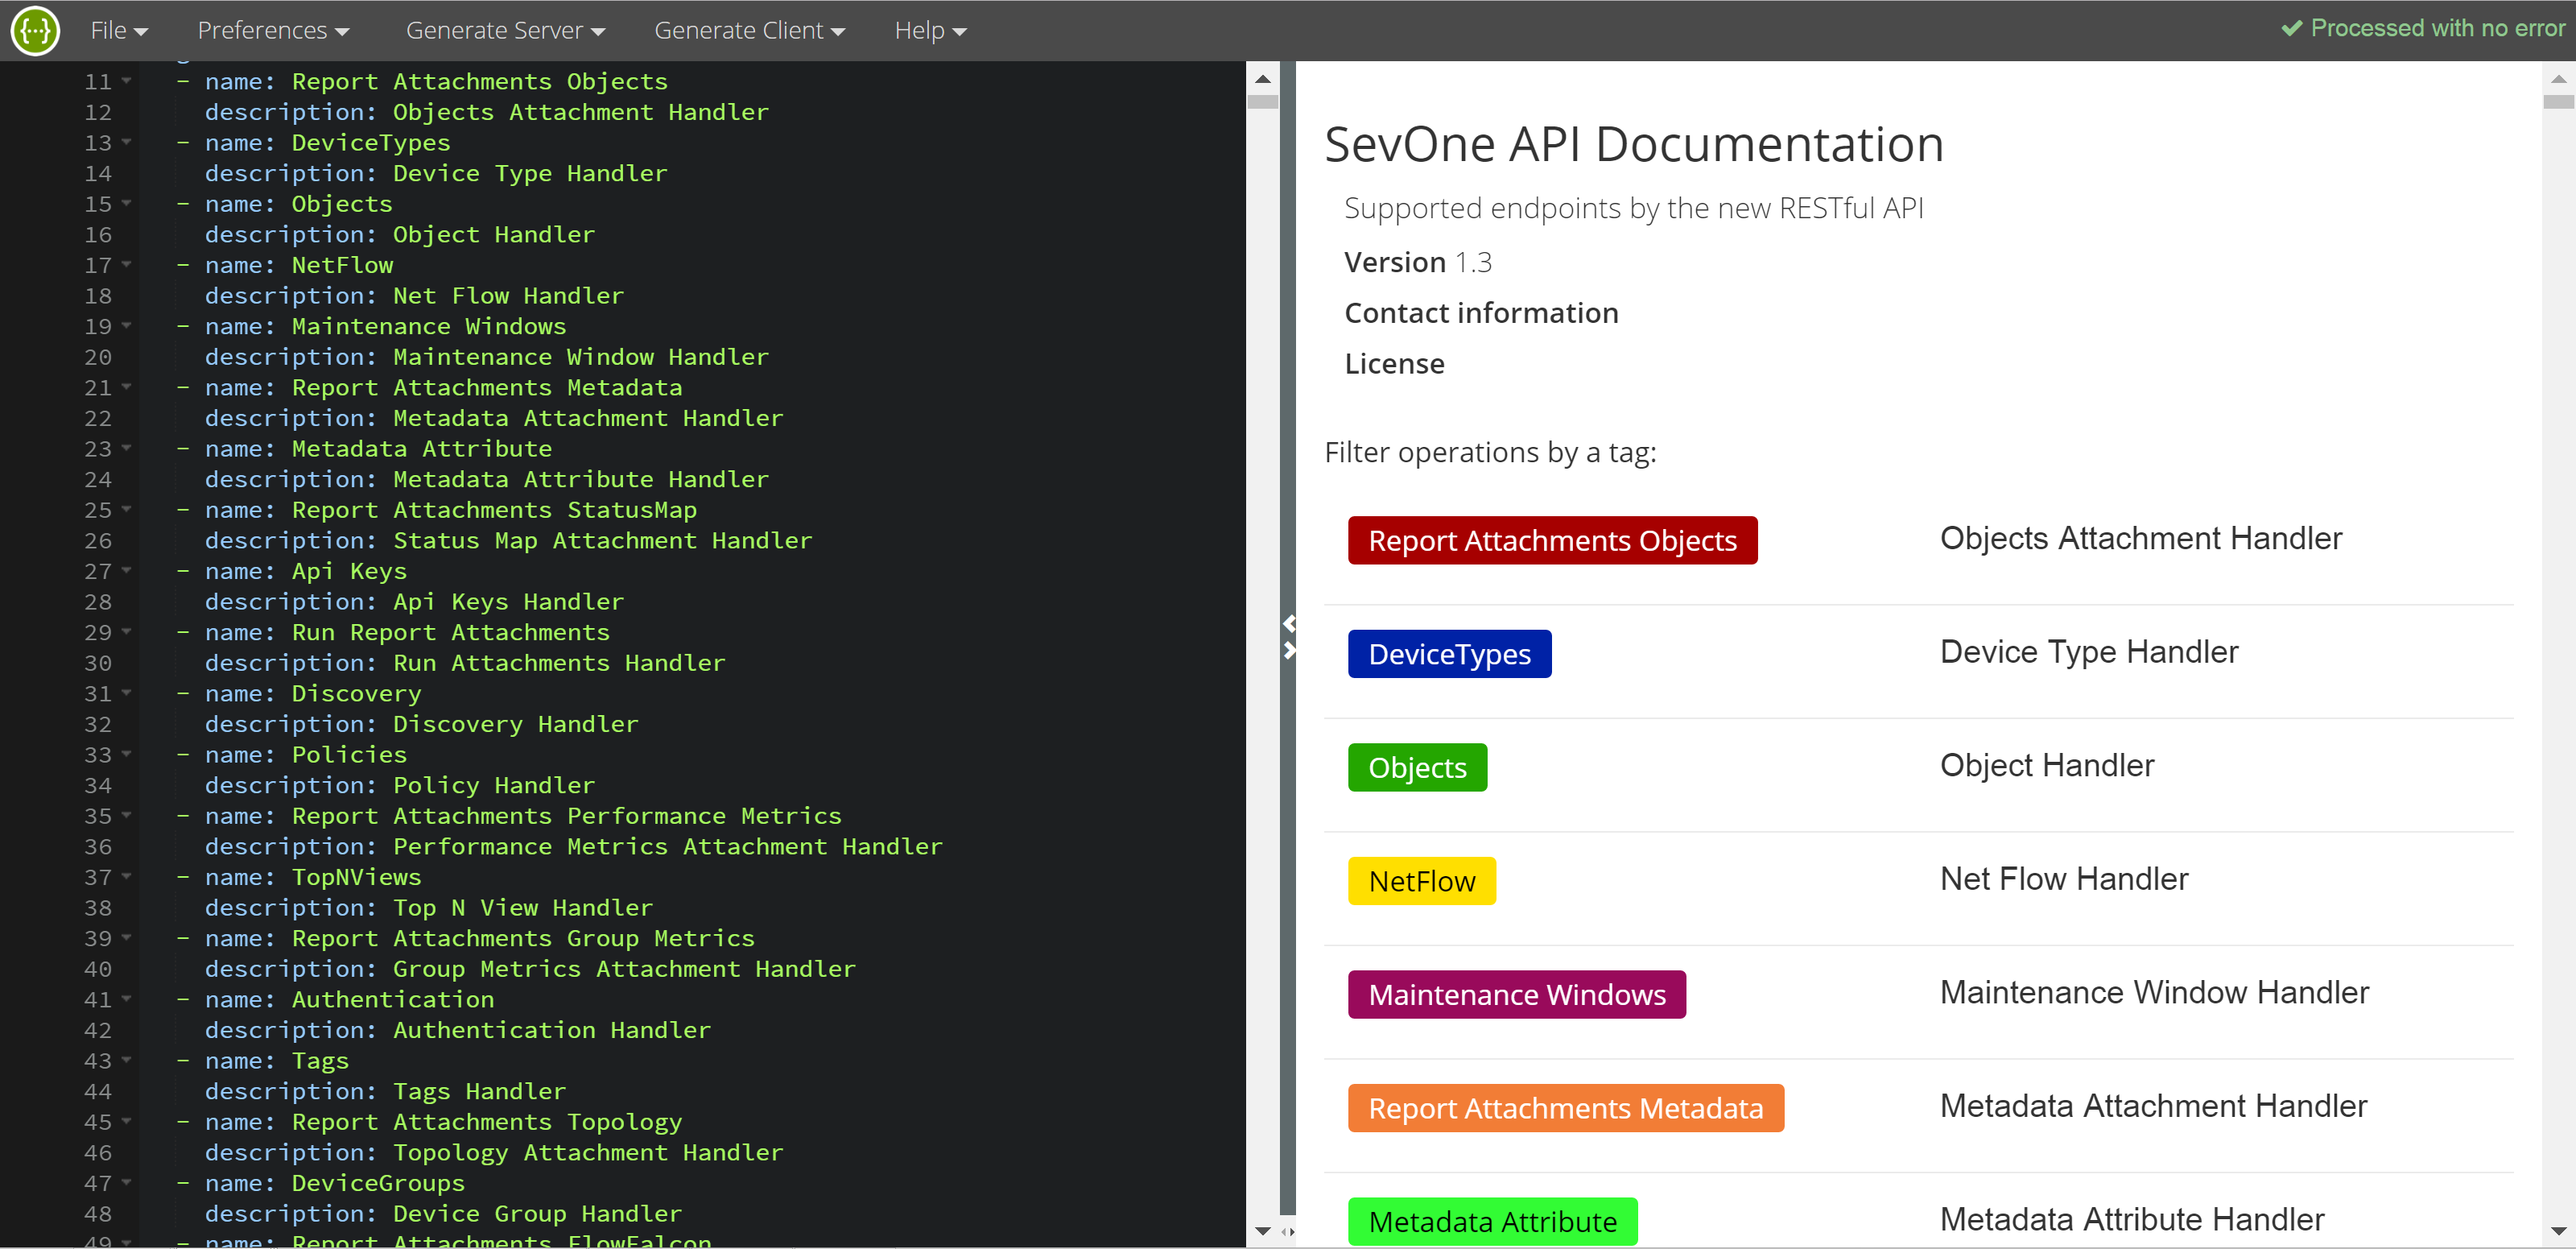
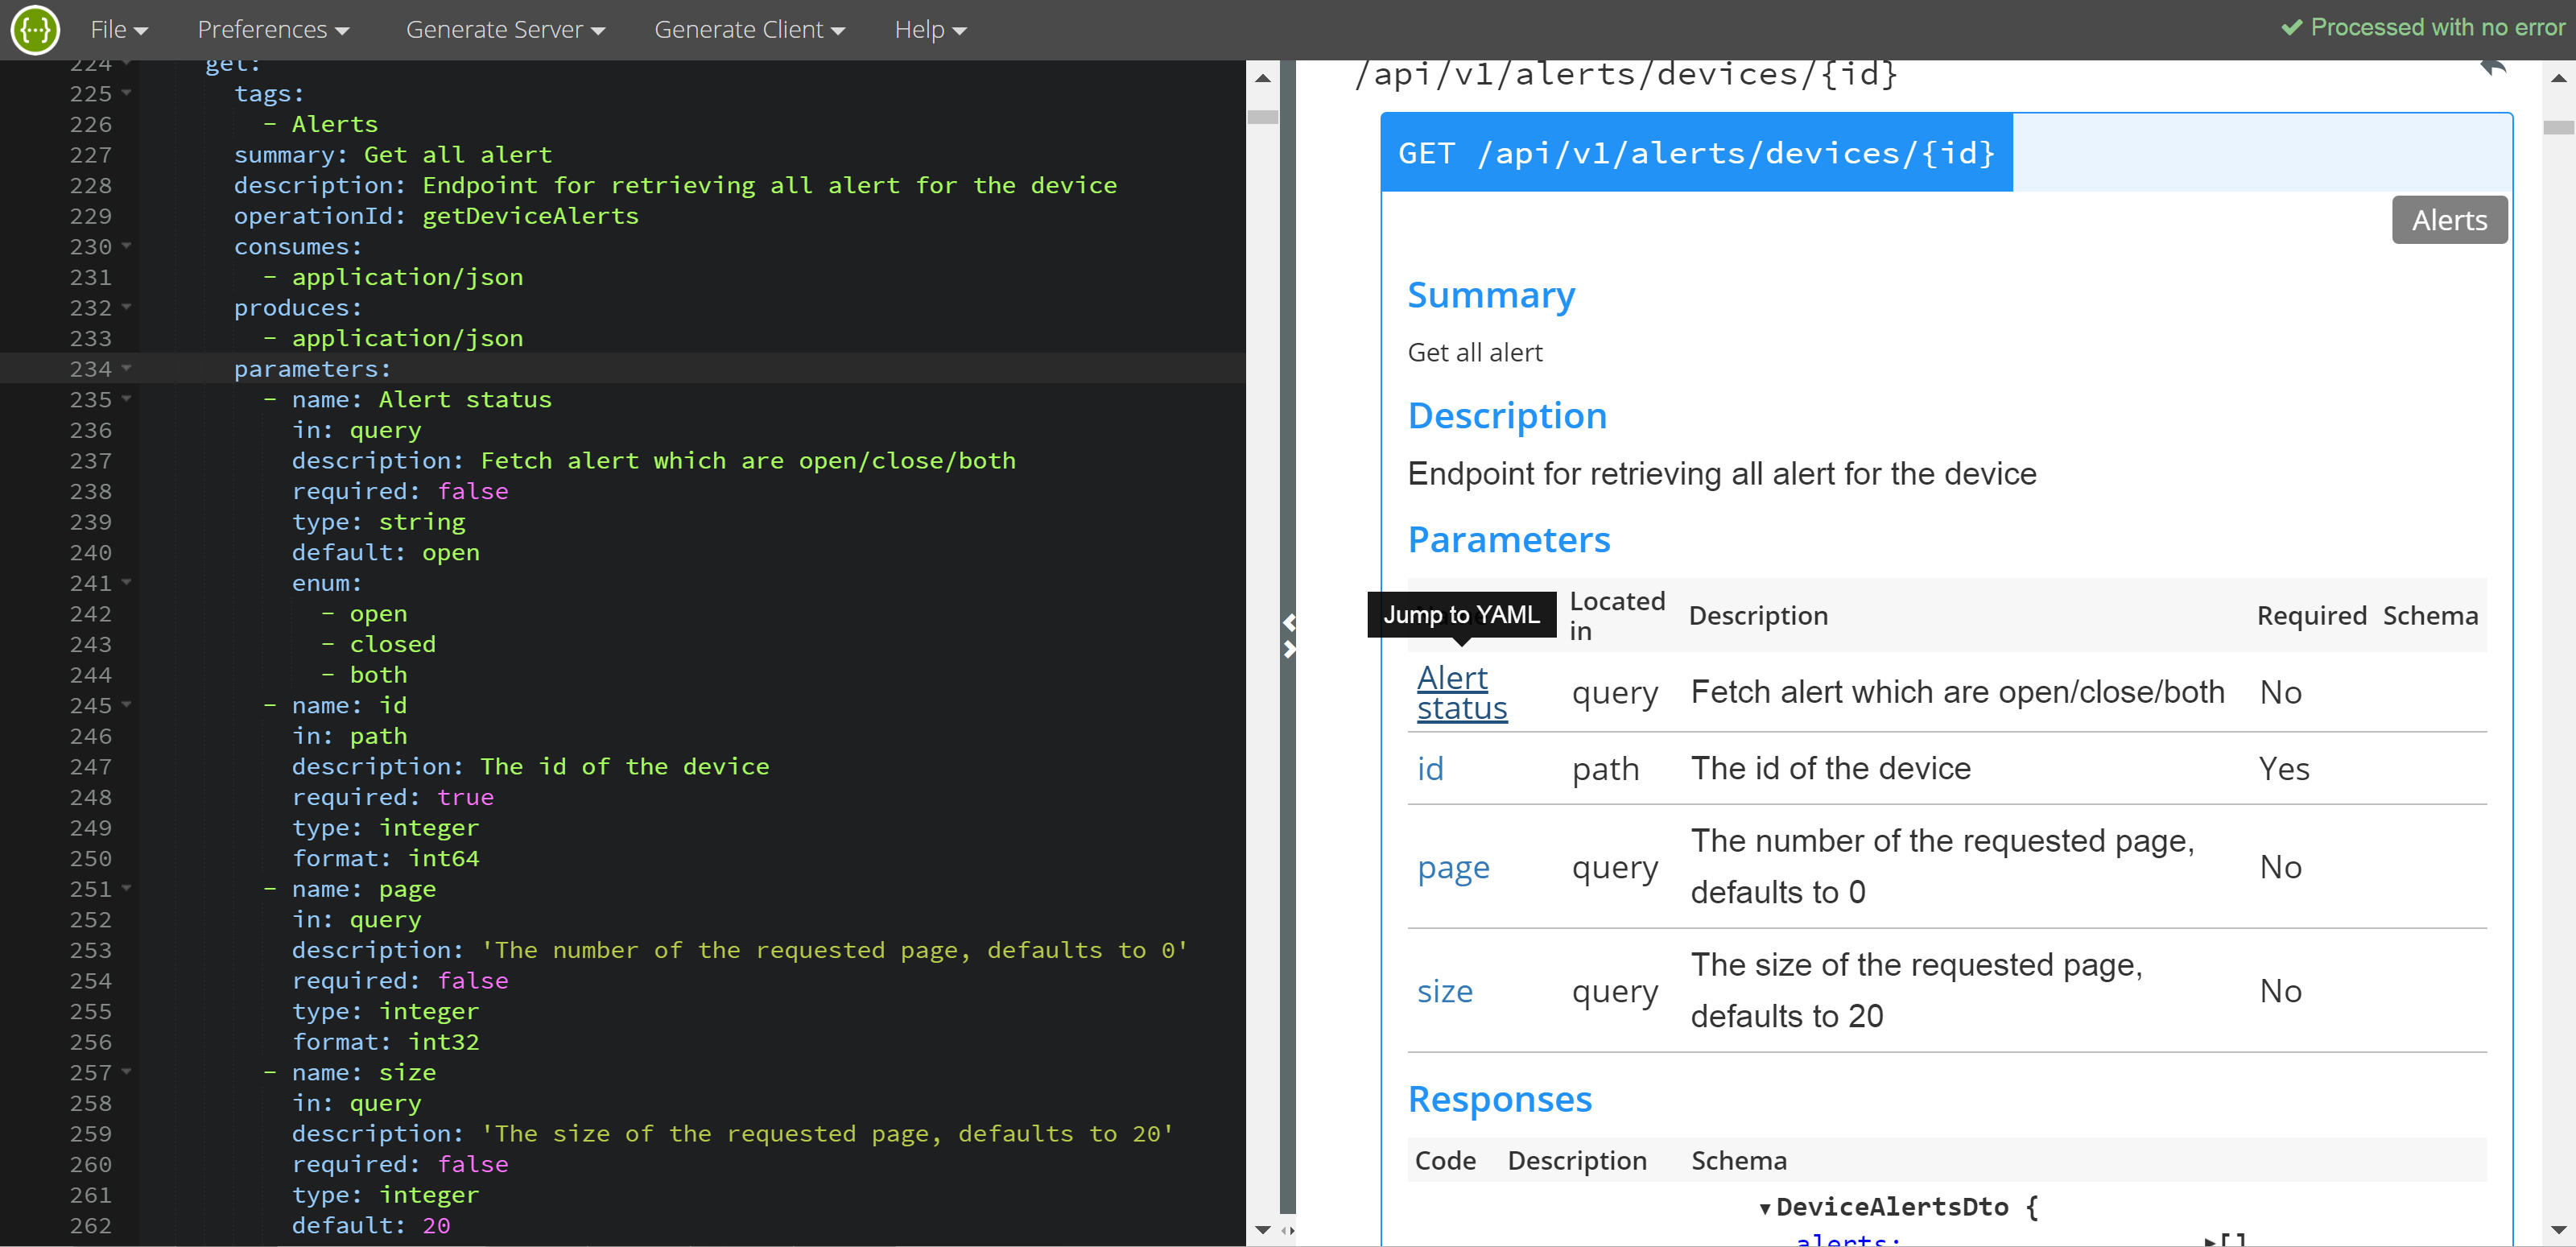
Clicking on an item in the SevOne API documentation (right side of the page) takes you directly to the markdown format of the item on the left side of the page.
-
At the top of the page, click Generate Client and select a language for the client. Once the client is generated, it will be downloaded to your machine.
You'll need a tool that can convert markdown language to HTML. The following screenshot shows an example of a client SDK in PHP. The documentation appears on the right side of the page. On the left is the documentation in markdown format.
Troubleshooting
After you execute an operation, you'll see an HTTP status code in the Response Code field. This code represents the status of the operation. For example, 200 indicates that the operation was successful. If an operation fails,
you may see information about the problem
in the Response Body field. The following screenshot shows an error that occurs if you try to perform an operation without first authenticating. The relevant HTTP status code is 401, and the description for the code is Unauthorized. In this case, additional information about the error appears after "detail":.

The following table contains some common HTTP status codes along with their descriptions. You can find detailed information about HTTP status codes at the Hypertext Transfer Protocol (HTTP) Status Code Registry.
|
Status Code |
Description |
|
200 |
OK |
|
201 |
Created |
|
400 |
Bad Request |
|
401 |
Unauthorized |
|
403 |
Forbidden |
|
404 |
Not Found |
|
409 |
Conflict |
|
422 |
Unprocessable Entity |
|
500 |
Internal Server Error |
|
503 |
Service Unavailable |